
Blender blades are sharper than they look. Learn how to wash blender blades safely, avoid common cleaning mistakes, and protect your hands during everyday kitchen cleanup.
Why Blender Blade Safety Matters More Than People Think
Blenders make everyday cooking easier. Smoothies, soups, sauces, dips, protein shakes, pancake batter, and baby food can all come together in just a few seconds. But once the blending is done, there is one part of the routine many people rush through: cleaning the blades.
It seems simple enough. You rinse the jar, reach in with a sponge, wipe around the bottom, and move on. The problem is that blender blades are often much sharper than they appear. They are also set at awkward angles, which means your fingers can brush against an edge before you even realize it.
Many kitchen cuts happen during cleanup, not during cooking. A blender blade injury is especially frustrating because it usually happens when you are tired, distracted, or just trying to finish the dishes quickly. The good news is that most of these cuts are preventable with a few small habits.
You do not need special equipment or a complicated cleaning routine. You just need to stop treating the blender jar like a regular cup and start treating the blade area like a sharp kitchen tool.
The Hidden Risk of Blender Blades
Blender Blades Are Sharp Even When They Look Dull
A blender blade does not always look like a chef’s knife. It may be short, thick, or slightly curved. Some blades even look rounded compared to a knife edge. That can make people assume they are not very dangerous.
But blender blades are designed to tear through frozen fruit, ice, nuts, fibrous vegetables, and thick mixtures. They may not slice like a knife in the same way, but the edges can still cut skin quickly.
Another issue is the blade angle. Most blender blades point in different directions. One edge may angle upward while another sits lower in the jar. When you reach inside with a sponge, your fingers may slide into a hidden edge.
This is why cleaning a blender by feel is risky. If you cannot clearly see where your fingers are, you should not assume they are safe.
Wet Hands Make Accidents More Likely
Water, soap, and food residue make everything slippery. A blender jar can be heavy when wet, and the blade base can be awkward to hold. If your hand slips while you are scrubbing, your fingers may move directly into the blades.
This often happens when someone is holding the blender jar under running water with one hand and cleaning with the other. The jar shifts, the sponge moves, and suddenly the blade catches the side of a finger.
It is not dramatic or unusual. It is just a common kitchen moment where a small slip can cause a painful cut.
Rushing Is One of the Biggest Problems
Most people wash blender blades right after making something messy. Maybe breakfast is running late. Maybe the kids need help. Maybe dinner cleanup is already taking too long.
When you rush, you tend to push the sponge harder, skip steps, and reach into the jar without looking. You may also forget whether the blender is still plugged in or whether the blade assembly has been fully removed.
A safer routine does not have to take much longer. In many cases, the safest method is actually faster because you let the blender clean itself first.
The Safest First Step: Let the Blender Clean Itself
Use the Soap-and-Water Method
One of the easiest ways to clean blender blades without putting your fingers near them is to use the blender’s own motion.
After using the blender, add warm water to the jar. You do not need to fill it all the way. Usually, halfway is enough. Add a small drop of dish soap, secure the lid, and run the blender on low or medium speed for 20 to 30 seconds.
The spinning water loosens food from the blade area and the sides of the jar. This works especially well for smoothies, protein shakes, sauces, and soft mixtures.
After blending the soapy water, pour it out and rinse the jar well. In many cases, that is all you need.
Do Not Overdo the Dish Soap
A common mistake is adding too much soap. Blender jars can create a lot of foam very quickly. If you use too much dish soap and turn the blender on high, bubbles may push up toward the lid or leak out.
A small drop is enough. Think of it as a quick cleaning rinse, not a bubble bath.
If your blender has a tight-sealing lid, still keep one hand on the lid while running the cleaning cycle. Start on a low speed first so the liquid does not splash unexpectedly.
Use Warm Water, Not Boiling Water
Warm water helps loosen sticky residue. But boiling water is not a good idea for most blender jars. Very hot water can create pressure, damage parts, or cause steam to build up under the lid.
Use comfortably warm tap water instead. If you blended something oily or sticky, warm water plus a drop of dish soap usually works better than cold water.
What to Do Before You Touch the Blade Area
Unplug the Blender First
Before you remove the jar, twist off the blade base, or clean near the motor area, unplug the blender.
This may sound obvious, but it is easy to forget when you are cleaning in a hurry. Even if the blender is switched off, unplugging it adds one more layer of safety. You do not want the blender to start unexpectedly while your hands are near the blades.
If you use a personal blender with a cup-style blade attachment, make sure the blade piece is not sitting on the motor base while you are cleaning it.
Separate the Parts Carefully
Some blenders have removable blade assemblies. Others have fixed blades built into the jar. Check your blender’s manual if you are not sure which type you have.
If the blade assembly comes off, remove it slowly and place it on the counter with the blades facing away from your hands. Do not drop it into a sink full of dishes where someone might reach in and grab it by accident.
If the blades do not come out, avoid reaching deep into the jar. Use a long-handled brush instead.
Let the Jar Sit for a Minute If Food Is Stuck
Sticky mixtures are harder to clean safely. Peanut butter smoothies, thick hummus, pesto, blended oats, and dried-on sauce can cling around the blade base.
Instead of forcing a sponge into the blade area, add warm soapy water and let it sit for a few minutes. This softens the residue so you do not need to scrub aggressively.
A little patience is safer than using your fingers to dig around the blades.
The Best Tools for Cleaning Blender Blades Safely
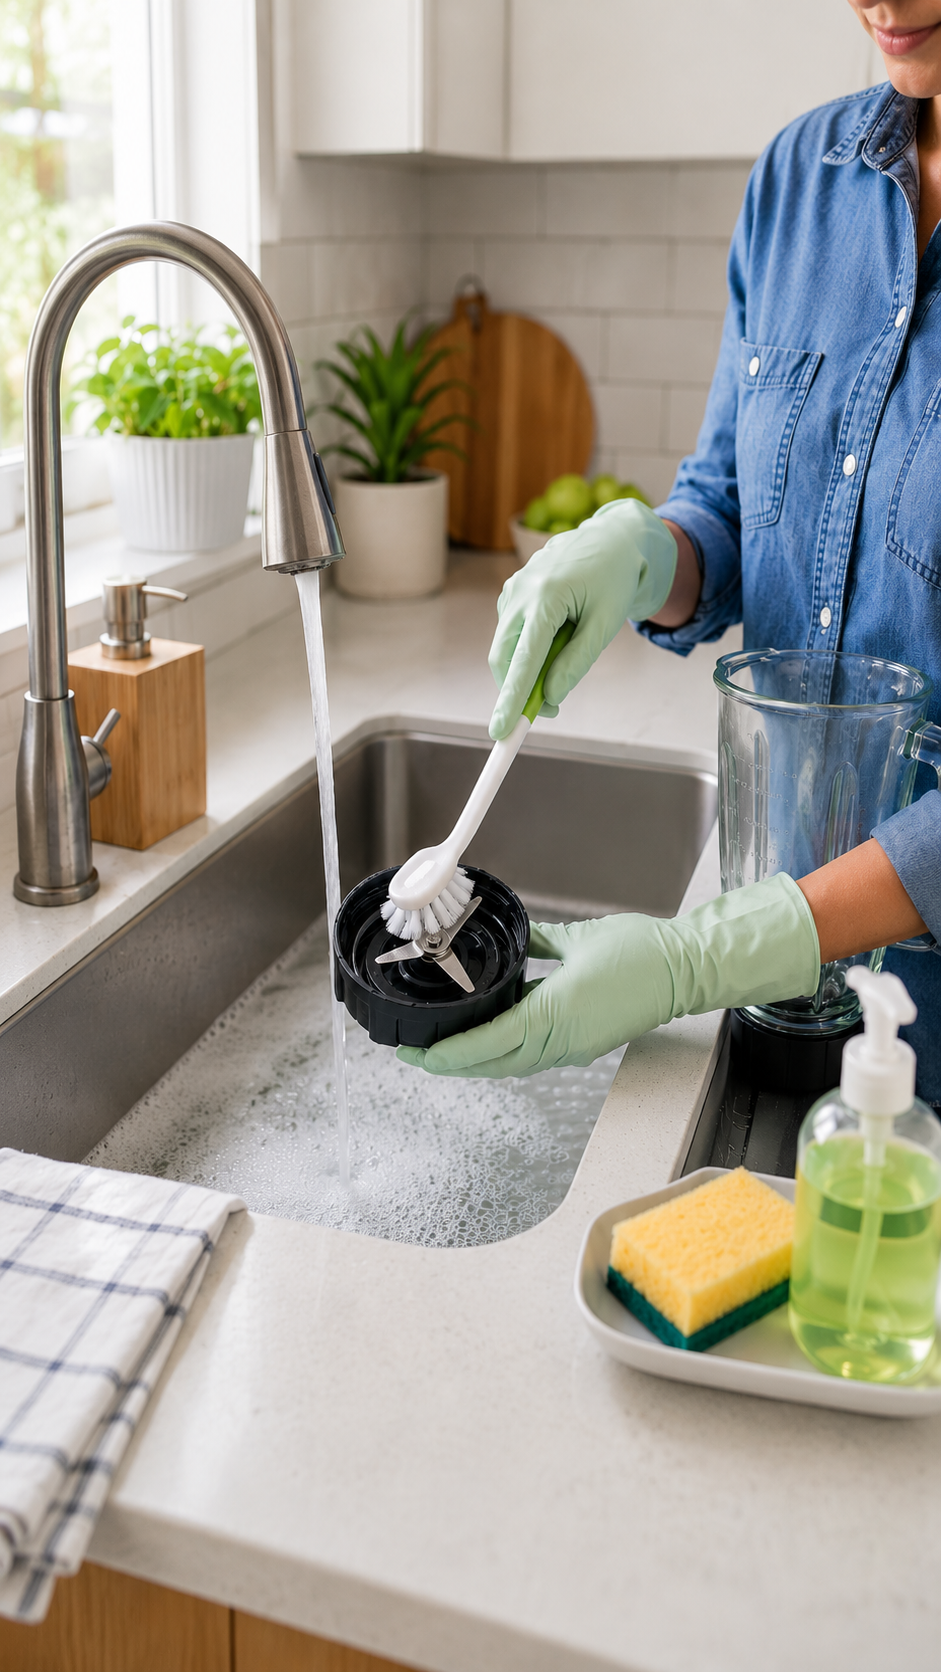
Use a Long-Handled Dish Brush
A long-handled dish brush is one of the best tools for blender cleaning. It lets you scrub around the blades without placing your fingers close to the edges.
Choose a brush with firm bristles and a handle long enough to reach the bottom of the jar. A bottle brush can also work well for narrow blender cups.
Use the brush after the soap-and-water blending method. By then, most of the food will already be loosened, so you only need light scrubbing.
Use a Small Detail Brush for Tight Spots
Some blender parts have rubber seals, ridges, or small grooves where food can collect. A small cleaning brush can help with these areas.
You can use a narrow dish brush, straw brush, or dedicated kitchen detail brush. Just avoid using your fingernails to scrape food out of tight spaces near the blade.
If you clean your blender often, keeping a small brush near the sink makes the safer choice more convenient.
Avoid Thin Sponges Near the Blades
A thin sponge can fold around the blades and pull your fingers too close. This is especially risky if you press down hard.
If you do use a sponge, hold it from the far edge and keep your fingers away from the blade area. But for regular cleaning, a brush is safer and easier.
A sponge is fine for the upper walls and outside of the jar. The blade area deserves a tool with a handle.
Common Mistakes That Lead to Cuts
Reaching Into the Jar Without Looking
One of the most common mistakes is reaching into the blender jar while looking somewhere else. Maybe you are talking to someone, checking your phone, or watching the water run.
Blender blades sit low in the jar, so it is easy to misjudge the distance. If your fingers go in deeper than expected, you may touch the blade.
Always look into the jar before cleaning. If the jar is cloudy, soapy, or full of water, pour it out first so you can see what you are doing.
Washing Blades in a Sink Full of Dishes
Do not leave loose blender blades or blade attachments hidden under plates, bowls, or cloudy dishwater. This is one of the easiest ways for someone to get cut.
A person may reach into the sink expecting a spoon or cup and grab the blade by mistake. Even if you live alone, you might forget it is there.
Wash blade pieces separately and keep them visible. Place them on the side of the sink or on a towel with the sharp edges facing away from where hands naturally reach.
Using Your Finger to Remove Stuck Food
It is tempting to use your fingertip to remove a small piece of spinach, nut butter, fruit peel, or dough from under the blade. Do not do it.
A toothpick, small brush, or stream of water is a safer choice. If food is stuck badly, soak the part first.
Your finger should not be the cleaning tool.
Twisting the Blade Base Too Quickly
Personal blenders often have a blade lid that twists onto the cup. After blending, people sometimes flip the cup over and quickly twist off the blade piece.
If the cup is slippery or pressurized from thick contents, the part can shift suddenly. Slow down and keep your hands on the outer grip areas, not near the blades.
Make sure the cup is upright and stable before removing the blade attachment.
How to Clean Different Types of Blenders
Full-Size Countertop Blenders
For a standard countertop blender, start with the self-cleaning method. Add warm water and a drop of dish soap, run the blender briefly, then rinse.
If the blade assembly is removable, unplug the blender before taking anything apart. Remove the blade base according to the manufacturer’s instructions, then clean it with a brush.
Pay attention to the rubber gasket or sealing ring. Food can collect there, especially after making sauces or smoothies with seeds. Clean it gently and let it dry fully before reassembling.
Personal Blenders
Personal blenders are convenient, but the blade attachment can be tricky because it is small and sharp.
After blending, remove the cup from the motor base. Turn it upright and let the contents settle before opening. Once the blade attachment is off, rinse it from the back side first so water pushes food away from the blade edges.
Use a brush to clean around the blade and gasket. Do not hold the blade piece from the inside. Grip it from the outer plastic rim.
Let the blade attachment dry in a safe spot where the sharp side is not hidden.
Immersion Blenders
Immersion blenders, also called stick blenders, have blades inside a small guard at the end. The guard can make the blade look safer, but it can still cut fingers.
Always unplug the immersion blender before cleaning. If the blending shaft detaches, remove it from the motor handle first.
Rinse the blade end under running water and use a small brush to clean inside the guard. Never put your fingers into the blade opening.
For dried-on food, soak only the detachable blending shaft if the manual says it is safe. Do not soak the motor handle.
Warning Signs You Need to Slow Down
The Blender Jar Feels Slippery
If the outside of the jar is slippery with oil, smoothie, or soap, stop and rinse the outside first. Dry your hands or use a towel for a better grip.
A slippery jar makes it more likely that your hand will slide while you are cleaning near the blade.
You Cannot See the Blades Clearly
Cloudy water, thick foam, or leftover food can hide the blade edges. Pour out the water and rinse before you continue.
You should never scrub blindly around blender blades.
Food Is Wrapped Around the Blade
Fibrous foods like celery strings, leafy greens, herb stems, or fruit peels can wrap around the blade. Do not pull them off with your fingers.
Use tweezers, a brush, or a wooden toothpick, and work slowly. Make sure the blender is unplugged before doing this.
The Blade Assembly Feels Loose or Damaged
If the blade assembly wobbles, leaks, or looks cracked, stop using it until you check the manual or replace the part. Damaged blender parts can be harder to clean and may not sit securely.
A loose blade area can also trap food, making cleanup more difficult.
A Simple Step-by-Step Safe Cleaning Routine
Step 1: Rinse Right After Use
The sooner you rinse the blender, the easier it is to clean. Fresh smoothie residue comes off quickly. Dried smoothie residue becomes sticky and stubborn.
After pouring out your food or drink, add a little warm water and swirl it around. This quick rinse keeps food from drying around the blades.
Step 2: Run Warm Soapy Water in the Blender
Add warm water and a small drop of dish soap. Put the lid on securely and run the blender for 20 to 30 seconds.
Start low, then increase slightly if needed. This loosens most residue without your hands going near the blades.
Step 3: Pour, Rinse, and Check
Pour out the soapy water and rinse the jar well. Look at the blade area carefully.
If it looks clean, you may be done. If there is still residue, move to the next step.
Step 4: Use a Long-Handled Brush
Use a brush to scrub around the blade base. Keep your fingers above the blade level. Let the bristles do the work.
Do not press so hard that the brush slips. Gentle repeated strokes are safer than one forceful scrub.
Step 5: Clean Removable Parts Separately
If your blender has a removable gasket, lid insert, or blade base, clean each piece separately according to the manual.
Keep sharp parts visible and away from the main pile of dishes.
Step 6: Dry Everything Before Reassembling
Let the blender parts air dry completely. Moisture trapped around the gasket or blade base can lead to odors or buildup.
Place blade pieces in a safe drying position. Avoid leaving them loose in a drawer or under a towel where someone might grab them unexpectedly.
Extra Safety Tips for Busy Kitchens
Teach Family Members the Safe Routine
If several people use the blender, make sure everyone knows how to clean it safely. This is especially helpful in homes with teenagers, roommates, or family members who make smoothies often.
A simple rule works well: never reach into the blender jar with your fingers.
Keep a Blender Brush Near the Sink
People are more likely to use the safe tool when it is easy to find. Keep a long-handled brush near the sink or in a kitchen caddy.
If the only tool nearby is a sponge, someone will probably use the sponge.
Do Not Leave Blades Soaking Unseen
Soaking can be helpful, but hidden blades are a hazard. If you need to soak a blade attachment, place it in a clear bowl or keep it separate from other dishes.
Do not drop it into a sink full of cloudy water.
Be Careful When Loading the Dishwasher
Some blender parts are dishwasher-safe, and some are not. Check the manufacturer’s instructions.
If you place a blade assembly in the dishwasher, position it so the sharp edges are not pointing upward where someone might reach. When unloading, look before grabbing.
Also remember that dishwasher cleaning may not remove all food from tight gasket areas. A quick inspection afterward is still useful.
What Not to Use When Cleaning Blender Blades
Do Not Use Steel Wool Around Blades
Steel wool can catch on sharp edges and create small metal fragments. It can also scratch some blender parts.
A dish brush is usually enough. For tough residue, soaking is safer than aggressive scraping.
Do Not Use Your Hand Inside a Running Blender
This should go without saying, but never put any utensil, finger, or cleaning tool into a blender while it is running. Even when the blender is off, unplug it before working near the blades.
If something is stuck, stop the blender fully and disconnect power first.
Do Not Ignore the Manual
Every blender is a little different. Some blade assemblies are removable. Some gaskets need to be removed and cleaned. Some jars can go in the dishwasher, while others cannot.
The manual may feel boring, but it can tell you the safest way to take parts apart and put them back together.
How to Store Blender Parts Safely
Keep Blade Attachments Covered or Separate
If you have a personal blender, do not toss the blade attachment loose into a crowded drawer. Store it in a predictable place, ideally with the blade side protected or facing down in a stable position.
If your blender came with a cap or storage cover, use it.
Reassemble Only When Fully Dry
Putting the blender back together while parts are still wet can trap moisture. This may cause smells or residue buildup.
Let everything dry first, then reassemble the jar and blade base carefully.
Store the Blender Where It Will Not Fall
A heavy blender jar falling from a shelf can break or expose sharp parts. Store it on a stable surface where it is easy to lift with both hands.
This matters more if the jar is glass.
When to Replace Blender Parts
Cracked Plastic or Loose Seals
If the jar, blade base, or gasket is cracked, it may leak or trap food. Cleaning becomes harder, and you may be tempted to scrub more aggressively around sharp areas.
Replacing worn parts can make the blender safer and easier to maintain.
Rust or Rough Blade Edges
If the blades show rust, rough edges, or damage, check whether replacement parts are available. Damaged blades may not blend well and may be harder to clean.
Do not try to sharpen or repair blender blades yourself unless the manufacturer specifically provides instructions.
Persistent Odors or Buildup
If the blender smells bad even after cleaning, food may be trapped under the gasket or around the blade base. Take the parts apart according to the manual and clean them thoroughly.
If the odor remains, it may be time to replace a gasket or blade assembly.
A Calm Reminder About Kitchen Cuts
Most blender cleaning injuries are not caused by one big mistake. They usually come from small habits: rushing, using a sponge too close to the blade, washing sharp parts in a crowded sink, or reaching into the jar without looking.
The safer habits are just as simple. Let the blender clean itself with warm soapy water. Use a long-handled brush. Keep sharp parts visible. Unplug the blender before handling the blade area. Never use your fingers to scrape out food.
These small steps can make cleanup feel less risky and more routine.
Conclusion: Make Blender Cleaning Safer With Better Habits
Blenders are useful kitchen tools, but the blades deserve respect during cleanup. You do not need to be afraid of them. You just need to slow down for a moment and use the right method.
Start with warm water and a small drop of dish soap. Let the blender run briefly to loosen residue. Rinse, inspect, and use a long-handled brush if anything is still stuck. Keep your fingers away from the blade edges, especially when the jar is slippery or full of cloudy water.
A safer blender-cleaning routine only takes a little extra attention, but it can prevent painful cuts and make everyday kitchen cleanup smoother. The next time you finish a smoothie, soup, or sauce, let the blender do the first round of cleaning for you—and keep your hands safely out of the blade zone.
Leave a Reply