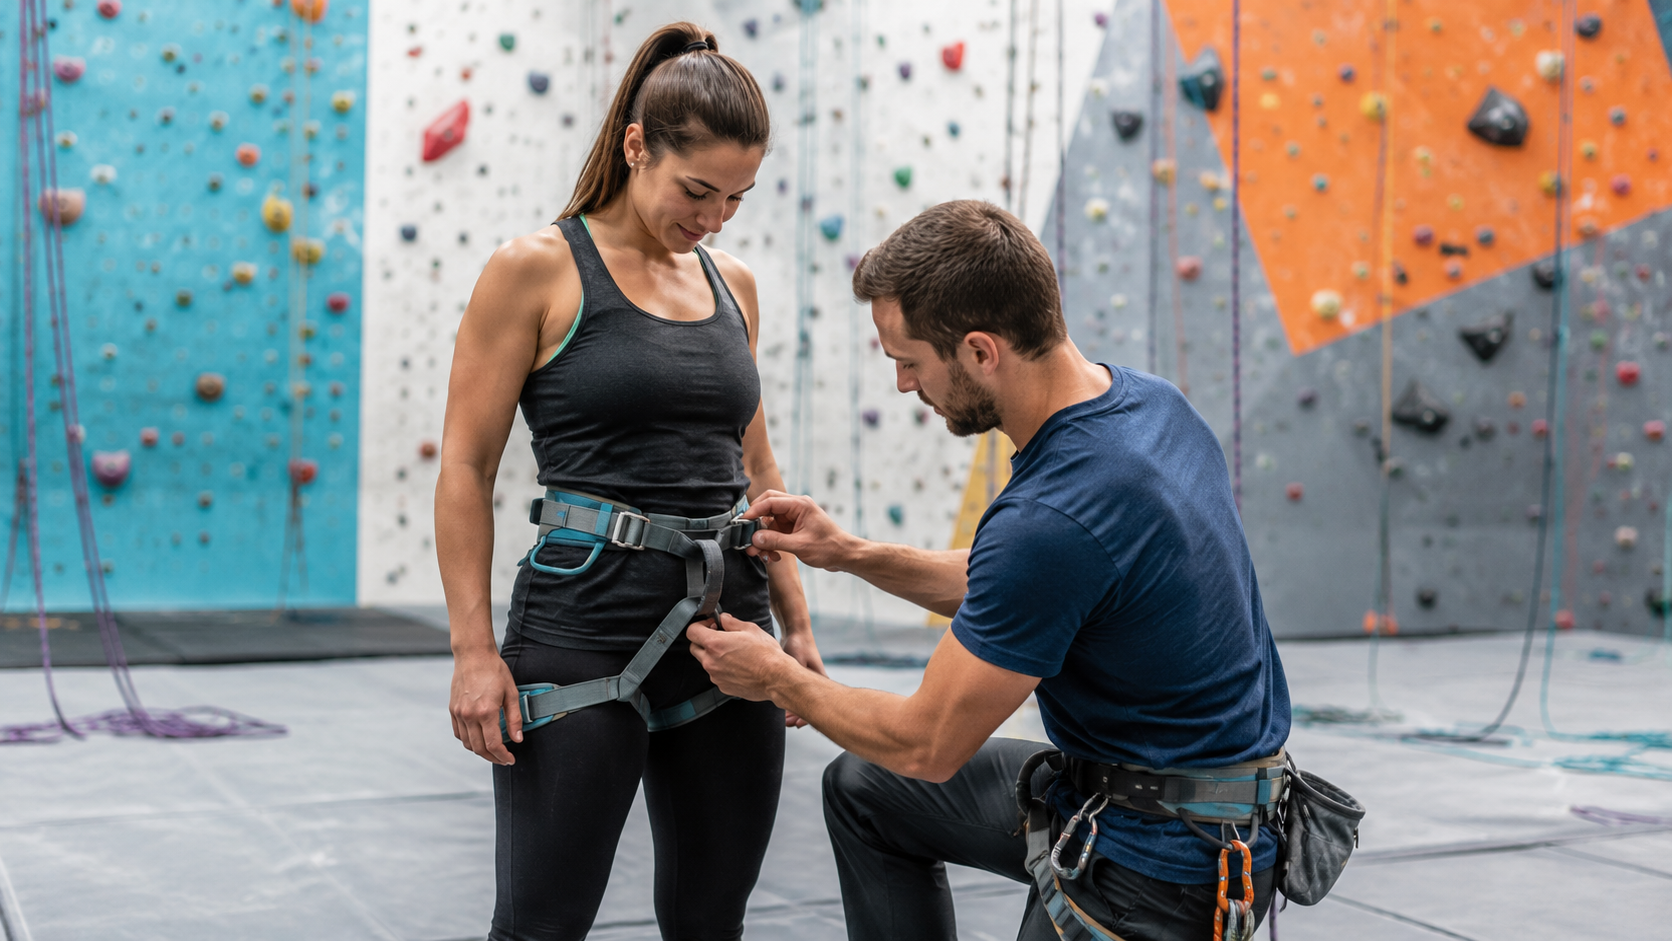
Why Checking Your Harness Matters So Much at an Indoor Climbing Gym
Minjin Park
·
Indoor climbing is fun and beginner-friendly, but a quick harness and safety check before every climb helps prevent avoidable mistakes with buckles, tie-ins, auto belays, and belay systems.
Indoor climbing gyms are exciting places. There is music, chalk dust, colorful holds, people cheering each other on, and routes that make you want to try “just one more climb.” For beginners, the gym can feel safer and more controlled than outdoor climbing, and in many ways it is. The walls are built for climbing, the floors are padded in bouldering areas, the routes are set by trained staff, and rental gear is available.
But indoor climbing still depends on safety systems being used correctly.
One of the most important pieces of that system is the harness. Some new climbers call it a “safety belt,” which makes sense because it wraps around your waist and legs. In climbing, though, the proper word is harness. It connects your body to the rope or auto belay system and helps support you if you fall or lower from the wall.
That is why checking it matters every time.
A harness that is too loose, twisted, clipped incorrectly, or not connected to the rope or auto belay properly can turn a fun climbing session into a serious problem. The good news is that most harness mistakes are preventable with a calm, consistent check before leaving the ground.
Indoor Climbing Feels Casual, But the System Is Serious
Indoor climbing is often social. Friends talk while tying in. Parents help kids adjust shoes. New climbers listen to instructions while looking around the gym. Experienced climbers may move quickly because they have done the same routine hundreds of times.
That relaxed atmosphere is part of what makes climbing gyms enjoyable. But it can also lead to small oversights.
A climber may forget to tighten the waist belt after adjusting the leg loops. A belayer may clip a carabiner but forget to lock it. Someone using an auto belay may step onto the wall before confirming the device is attached to the harness. A knot may look almost right but not be fully dressed or tied through the correct points.
The Climbing Wall Association has emphasized orientations and competency assessments for auto belay users, noting that climbers need to understand proper equipment use and personal responsibilities before using those systems.
The lesson applies broadly: indoor climbing is beginner-friendly, but it is not a place to skip basic checks.
What the Harness Actually Does
A climbing harness is designed to distribute force around stronger parts of the body, mainly the waist and upper legs, when the rope or belay system catches you. It is not just a belt. It is a piece of safety equipment with specific parts: a waist belt, leg loops, buckles, tie-in points, and usually a belay loop.
Petzl explains that the front of a climbing harness usually includes a belay loop and two tie-in points, which are used for attaching a lanyard, belay device, or rope depending on the activity and system.
That is why “close enough” is not good enough. The rope or clip needs to be connected to the correct part of the harness. The waist belt needs to sit properly. The buckles need to be secured. The harness needs to match the climber’s body and the type of climbing they are doing.
If you are new, this may sound like a lot. In practice, it becomes a simple habit: put it on, tighten it, check the buckles, check the connection, and have another person or staff member confirm when needed.
Why the Waist Belt Position Matters
A harness should usually sit above the hips, not low on the hips like jeans. This matters because the hips help keep the harness from sliding down. If the waist belt is too low or too loose, it may not support the climber as intended during a fall or lower.
A good everyday check is to tighten the waist belt first, then check whether it can slide down over the hips. It should feel snug but not painfully tight. You should be able to breathe and move, but the harness should not hang loosely.
This is especially important for children and first-time climbers. Kids may have narrow hips or may wiggle around while getting ready. A harness that looked okay at the rental counter may need another adjustment before the climb.
If you are unsure, ask gym staff. That is what they are there for.
Why Buckles Deserve a Second Look
Different harnesses use different buckle designs. Some are auto-locking. Some require doubling back. Some rental harnesses may look different from personal harnesses. Some have adjustable leg loops, while others do not.
This is where assumptions can create problems.
A climber may think a buckle is finished when it still needs another step. A friend may check quickly without really looking. A parent may tighten one side but miss the other. A new climber may not know what “properly threaded” actually looks like.
UIAA, the international climbing and mountaineering federation, maintains safety standards for many types of climbing equipment, including harnesses. But certified equipment still has to be worn and used correctly by the climber.
The best habit is to check the buckle visually and physically. Look at it. Touch it. Confirm that straps are not twisted and that the buckle is secured the way the manufacturer and gym require.
The Partner Check: A Simple Habit That Prevents Mistakes
In roped climbing, a partner check is one of the most valuable habits you can build. It means the climber and belayer check each other before the climber leaves the ground.
This is not about mistrust. It is about teamwork.
Petzl’s lead climbing guidance says climber and belayer should check each other’s equipment setup before climbing, including the rope, device, and whether the setup is appropriate. Other climbing safety guidance also recommends checking the harness, harness buckles, tie-in knot, belay device, carabiner, and end of the rope before climbing.
A good partner check may take only a few seconds once you know what to look for. But those seconds matter because they catch mistakes before height is involved.
A basic partner check may include:
Check that the climber’s harness is snug, centered, and correctly buckled.
Check that the rope is tied through the correct tie-in points.
Check that the knot is properly tied, dressed, and has enough tail.
Check that the belayer’s device is threaded correctly.
Check that the carabiner is locked.
Check that the rope is long enough and managed properly.
Each gym may have its own required check procedure, so follow the rules where you climb.
Auto Belays Still Require a Harness Check
Auto belays can make indoor climbing more accessible because a person can climb without a human belayer. But they also introduce one very specific risk: forgetting to clip in.
That sounds obvious, but gyms take it seriously because people can become distracted. A climber may walk up to the wall, look at the route, chalk up, and start climbing out of habit. If they are not clipped into the auto belay, there is no rope system attached to them.
That is why auto belay areas often have warning signs, gates, mats, or reminders. The Climbing Wall Association’s auto belay guidance highlights the importance of orientations and assessments so climbers understand proper use of the device and their personal responsibility.
Before using an auto belay, pause and check:
Is the harness on correctly?
Is the auto belay carabiner attached to the correct point?
Is the carabiner locked?
Is the webbing or lanyard free of twists?
Did you test the connection gently before climbing?
Never assume you are clipped in because you are standing at an auto belay wall. Look down and confirm.
Common Mistake: Rushing Because the Gym Is Busy
Indoor climbing gyms can get crowded, especially after work, on weekends, or during kids’ classes. When people are waiting for a route, it is easy to feel rushed.
But safety checks should not shrink just because someone else is waiting.
A rushed climber may skip tightening the harness after switching with a friend. A rushed belayer may forget to lock a carabiner. A parent may try to manage two kids at once and miss a twisted strap. A beginner may nod along without fully understanding the staff instruction.
The solution is simple: step aside if you need more time. Finish the check before stepping onto the wall. A good climbing partner will respect that. A good gym culture encourages it.
Common Mistake: Assuming Rental Gear Fits the Same Every Time
Rental harnesses are convenient, but they are not all identical. Even in the same gym, one harness may fit differently from another. Straps may be adjusted from the previous user. A child may be given a different style than an adult. A beginner may not know which loop is which.
Do not put on a rental harness and assume it is already adjusted correctly.
Take a moment to loosen or tighten it properly. Make sure the waist belt sits above the hips. Check leg loops. Look for twists. Confirm buckles. If the harness feels strange, ask staff before climbing.
This is especially important when climbing with children. Kids grow, rental gear varies, and a harness that worked last month may not fit the same today.
Common Mistake: Clipping to the Wrong Loop
Harnesses have several loops, and not all of them are meant for life-support connections.
Gear loops, for example, are usually used to hold equipment such as quickdraws or chalk bags. They are not designed as primary attachment points for the rope or auto belay. A new climber may not know this by looking.
That is why instruction matters. The American Alpine Club explains that harnesses with two hard points are usually connected by a vertical belay loop, with the tie-in using a separate reinforced path from a carabiner clipped to the belay loop.
In plain English: different parts of the harness have different jobs.
If you are tying into a rope, learn exactly where the rope goes. If you are clipping into an auto belay, learn exactly where the carabiner goes. Do not guess based on what “looks strong.”
Why Kids Need Extra Attention
Indoor climbing is popular with families, and kids often love it. They are naturally curious, brave, and energetic on the wall. But they also need extra supervision around harnesses.
Children may not notice if a strap is twisted. They may tug on gear loops. They may sit down suddenly, loosen a buckle, or bounce around while waiting. They may also be too excited to listen carefully to instructions.
Parents should not assume gym staff are watching every child every second. Staff can help with fitting and instruction, but caregivers still need to stay attentive.
Before each climb, check the child’s harness again. Confirm the connection again. Remind them not to start climbing until an adult says the check is complete.
Keep the language simple: “Harness tight, clip locked, then climb.”
Why Experienced Climbers Still Check
Beginners make mistakes because they do not know the system yet. Experienced climbers make mistakes because the system feels too familiar.
Familiarity can lead to autopilot. A climber may talk while tying in. A belayer may use a new device without slowing down. A regular gym member may skip a partner check because they have climbed with the same person for years.
That is exactly why routines matter.
The check should happen every time, not only when you feel uncertain. It should happen on easy routes, not only hard ones. It should happen with close friends, not only new partners.
A careful check is not a sign that someone lacks skill. It is a sign that they take climbing seriously.
Warning Signs to Pause Before Climbing
There are times when you should stop and ask for help before leaving the ground.
Pause if the harness feels loose, uncomfortable, twisted, or uneven. Pause if you are not sure whether the buckle is secured. Pause if the rope is tied through only one point when the gym taught you to use two. Pause if the knot looks unfamiliar. Pause if the belay device or auto belay clip does not look the way staff demonstrated.
Also pause if you feel distracted, rushed, embarrassed, or unsure.
Climbing gyms are used to questions. Asking for a gear check is normal. It is much better to ask a basic question on the floor than to discover a problem halfway up the wall.
The exact words matter less than the consistency. A repeated checklist prevents the “I thought you checked it” problem.
Communication Is Part of the Safety System
A harness check is physical, but it is also social. Climbers and belayers need to speak clearly.
Before climbing, agree on basic commands such as “On belay?” “Belay on.” “Climbing.” “Climb on.” “Take.” “Lower.” Gyms may teach slightly different commands, so follow local instruction.
Good communication matters because the harness is only one part of the system. The climber, belayer, rope, device, carabiner, anchor, and commands all work together.
Do not be shy about speaking up. If something looks wrong, say so. If you did not hear the command, ask again. If you are not ready, say “Wait.”
A little awkwardness is better than silent confusion.
Practical Tips for First-Time Climbers
If it is your first time at an indoor climbing gym, arrive early enough to complete orientation without rushing. Listen carefully to staff instructions, even if you are athletic or have climbed before at another gym. Rules can vary by facility.
Wear comfortable clothing that lets the harness sit properly. Avoid bulky belts, long scarves, or items that interfere with the waist belt. Empty pockets that may be uncomfortable under the harness.
After staff fit your harness, ask them to explain what they are checking. This helps you learn instead of just standing there. Before climbing, repeat the check out loud if that helps you remember.
And if you forget something, ask. Everyone was new once.
Practical Tips for Regular Climbers
If you climb often, make the check part of your identity as a climber.
Do not let conversation interrupt tying in. Finish the knot, then talk. Do not start climbing while your partner is still organizing the rope. Do not treat auto belays casually. Do not skip checks on warm-up climbs.
Inspect your own gear regularly. If your harness shows unusual wear, damaged stitching, frayed material, or anything that worries you, stop using it and follow manufacturer or gym guidance. If you rent gear, tell staff if something looks worn or does not work properly.
Most of all, stay humble. Climbing safety depends on small steps done consistently.
Final Thoughts: A Harness Check Takes Seconds, But It Matters
Indoor climbing can be fun, social, challenging, and surprisingly beginner-friendly. But even in a well-run gym, the safety system depends on people using equipment correctly.
That is why checking your harness matters before every climb. Make sure it sits above the hips, fits snugly, is not twisted, and has secured buckles. Confirm the tie-in, auto belay clip, belay device, and locking carabiner. Use partner checks. Ask staff when unsure. Teach kids to wait for the check before climbing.
You do not need to be nervous on the wall. You just need to be consistent on the ground.
A careful harness check is a small pause that protects the fun. It helps everyone climb with more confidence, more awareness, and a better chance of ending the session the way it should end: tired, proud, and ready to come back again.
Hi, I’m the creator and editor behind ZestyHabit. I research everyday safety, first aid, and practical wellness topics using official guidance and reliable public sources, then turn that information into clear, realistic steps for daily life.
My goal is to help readers make safer, better-informed choices at home and beyond.