Best Hiking Survival Gear: 10 Essential Items to Carry in Case You Get Lost
Minjin Park
·
A familiar hiking trail can become surprisingly confusing when fog rolls in, daylight fades, or one wrong turn leads you away from the main path. Add an injured ankle, a sudden storm, or a dead phone battery, and an ordinary day hike can quickly become a survival situation.
This does not mean you need to carry a huge expedition pack every time you go outdoors. It does mean that even a short hike deserves some basic preparation. The right hiking survival gear can help you remain warm, hydrated, visible, and calm while you wait for assistance or make a careful decision about what to do next.
The National Park Service recommends carrying the Ten Essentials, including navigation tools, illumination, insulation, first-aid supplies, emergency shelter, water, and extra food. Your exact equipment should also reflect the season, weather, terrain, distance, and remoteness of your route.
Here are the most useful items to carry in case you become lost or stranded while hiking.
A smartphone navigation app is convenient, but it should not be your only way to find your location. Phones can run out of power, lose service, overheat, become wet, or break in a fall.
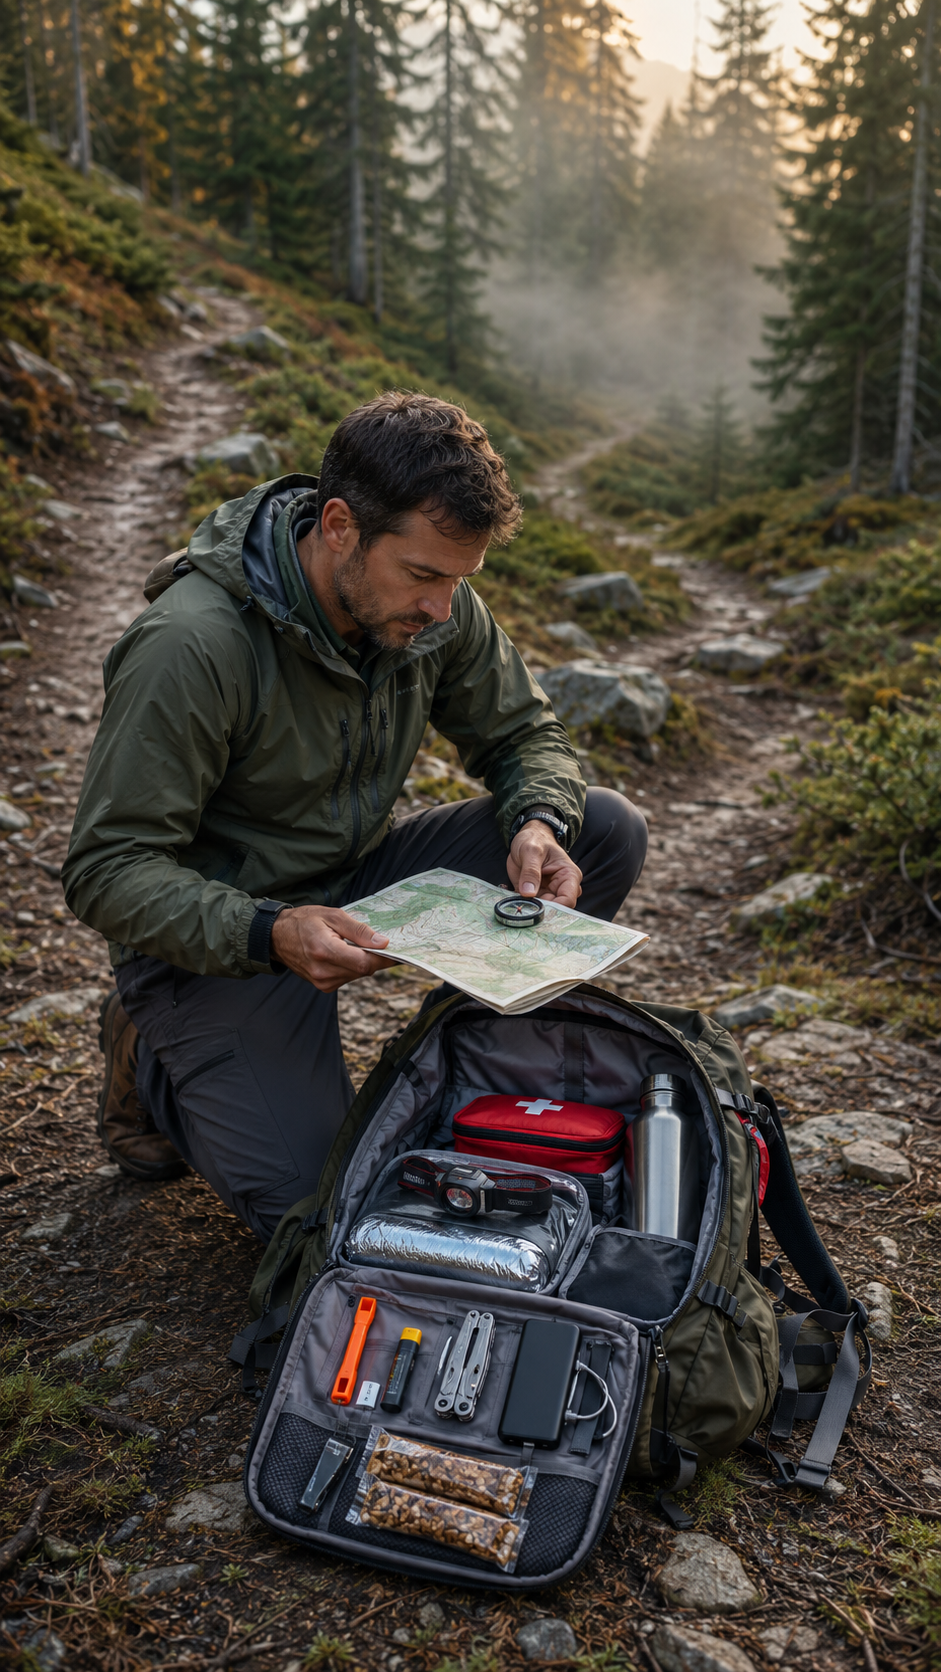
Carry a detailed paper map of the area in a waterproof pouch. A basic compass provides a reliable backup because it does not require a battery or cellular connection. However, simply owning a compass is not enough. Practice using it with a map before heading into unfamiliar terrain.
A GPS device or offline map downloaded to your phone can still be extremely helpful. Check that the map is available without an internet connection, fully charge your device, and place it in airplane mode when you do not need a cellular signal. This can help preserve battery life.
If you realize you may be lost, do not immediately begin walking in a random direction. The U.S. Forest Service recommends using the STOP approach: Stop, Think, Observe, and Plan. In many situations, especially after dark, when injured, or when unsure of the route, remaining in one safe and visible place is better than wandering farther away. The Forest Service specifically advises lost hikers to stay calm and avoid moving without a clear reason.
2. A Satellite Messenger or Personal Locator Beacon
Cell phone coverage can disappear quickly in mountains, forests, valleys, and other remote areas. A satellite messenger or personal locator beacon can provide a vital connection when ordinary phone service is unavailable.
A two-way satellite messenger may let you exchange text messages with rescuers, share your position, and explain whether someone is injured. A personal locator beacon, or PLB, is generally designed to transmit an emergency distress signal and your location when activated.
Learn how your device works before leaving home. Confirm that the battery is charged, the subscription is active if one is required, and the emergency contacts are current. In the United States, eligible 406 MHz personal locator beacons should be properly registered through NOAA’s beacon registration system.
A satellite device is not a guarantee of immediate rescue. Terrain, weather, battery condition, and satellite visibility may affect communication. It is still one of the most valuable safety tools for people who regularly hike alone or travel beyond reliable cellular coverage.
3. A Whistle and Signal Mirror
Calling for help repeatedly can exhaust you, irritate your throat, and produce less sound than you expect. A small emergency whistle is louder, requires less energy, and can be heard from farther away in many conditions.
Keep the whistle attached to your backpack strap or jacket rather than buried at the bottom of your pack. Three whistle blasts are commonly used as an emergency distress signal. Pause between sets so that you can listen for a response.
A signal mirror can attract attention during daylight, particularly from aircraft or search teams on distant ridges. Some emergency blankets also have a reflective surface that may be displayed in an open area. At night, a flashlight can be used to flash an SOS pattern—three short flashes, three long flashes, and three short flashes.
The goal is to make yourself easier to find without using unnecessary energy. The Forest Service recommends that a lost or separated hiker remain in place and use three whistle blasts as an emergency signal. Its backcountry guidance also emphasizes visibility and signaling.
4. An Emergency Bivy, Tarp, or Space Blanket
Exposure can become dangerous long before hunger does. Wind, rain, wet clothing, snow, or an unexpected night outdoors can rapidly reduce body temperature.
A lightweight emergency bivy sack usually offers better coverage than a thin, flat space blanket because it surrounds more of your body and is less likely to blow away. A small tarp can block wind and rain, while a reflective emergency blanket can help reduce heat loss and improve visibility.
These items are compact enough to carry on a day hike. They should not be treated as comfortable camping equipment, but they can provide critical protection when you cannot return before dark.
Choose a sheltered location away from falling branches, flood-prone streambeds, exposed ridges, and steep slopes. Insulate yourself from the cold ground using a foam sit pad, dry leaves, spare clothing, or your empty backpack. Avoid wrapping yourself so tightly that condensation soaks your clothing.
The National Park Service identifies emergency shelter as one of the most important parts of a hiking survival kit because it protects against severe weather and exposure.
5. Warm Layers and Waterproof Clothing
Weather at higher elevations may be colder, wetter, and windier than conditions at the trailhead. A sunny afternoon can turn into a cold evening, particularly if you are forced to stop moving because of an injury or navigation problem.
Pack an insulating layer and a waterproof or water-resistant outer shell, even if the forecast appears mild. Depending on the season, add a warm hat, gloves, neck covering, and spare socks. Synthetic fabrics and wool generally remain more useful when damp than ordinary cotton clothing.
A bright jacket has an additional advantage: it makes you easier for rescuers to see. If most of your clothing is dark or earth-colored, consider packing a brightly colored rain cover, bandanna, or emergency blanket.
Protect dry clothing inside a waterproof bag. In a real emergency, one dry base layer can make a substantial difference after your hiking clothes have become wet from rain, snow, or sweat.
6. A Headlamp With Spare Power
Darkness makes navigation more difficult and increases the risk of falls, missed trail markers, and poor decisions. A headlamp is generally more practical than a handheld flashlight because it leaves both hands free for balance, first aid, or shelter construction.
Carry it even when you expect to finish well before sunset. Delays caused by fatigue, an injury, confusing trail junctions, or helping another hiker can extend a trip by several hours.
Check the batteries regularly and pack a spare set or a compatible power bank. If your headlamp has several brightness settings, use the lowest practical setting to conserve energy. A red-light mode may also help preserve night vision.
Do not assume your phone flashlight is an adequate replacement. Using it continuously can consume the same battery you may need for emergency calls, navigation, location sharing, and communication with rescuers.
7. Water and a Reliable Treatment Method
Begin with enough drinking water for your planned route, weather, and exertion level. Then carry a backup method for treating additional water if your trip lasts longer than expected.
Options include a backcountry water filter, purification tablets, or a compact purification system. Different products remove or deactivate different organisms, so read the instructions and understand the limitations before relying on one.
In an emergency, avoid waiting until you are severely thirsty before looking at your remaining supply. Reduce unnecessary exertion, seek shade during extreme heat, and ration your physical activity rather than refusing to drink for long periods.
8. Extra Food That Requires No Cooking
Food may not be the first survival priority during a short emergency, but it can help you remain warm, alert, and capable of making careful decisions.
Choose compact foods that are calorie-dense, familiar to your stomach, and edible without a stove. Nuts, nut-butter packets, energy bars, dried fruit, jerky, crackers, and trail mix are practical options. Pack more than you expect to eat during the planned hike.
Store emergency snacks separately so that you do not consume them casually at the first rest stop. Check expiration dates periodically, especially if the survival kit remains in your backpack throughout the year.
If wildlife is present, follow the area’s food-storage rules. Do not scatter wrappers or food scraps around your shelter. Odors may attract animals, and litter can also make an already stressful situation more difficult to manage.
9. A First-Aid Kit and Personal Medication
A useful hiking first-aid kit should match the size of the group, length of the trip, and distance from help. At minimum, consider adhesive bandages, sterile gauze, medical tape, blister treatment, elastic wrap, antiseptic supplies, gloves, tweezers, and any medications you know how to use safely.
Personal prescription medicine is especially important. Carry enough for the trip plus a reasonable emergency reserve when appropriate. People with serious allergies may need prescribed epinephrine, while hikers with asthma, diabetes, or other medical conditions should carry their necessary supplies where companions can find them.
First-aid equipment is far more valuable when paired with training. A wilderness first-aid course can teach you how to control bleeding, protect an injured joint, recognize heat or cold illness, and decide when evacuation is necessary.
Do not attempt to “walk off” a serious injury simply because you are worried about causing inconvenience. Moving with a possible spinal injury, severe fracture, or major bleeding may make the situation worse.
10. Fire-Starting and Repair Supplies
Waterproof matches, a lighter, and a prepared fire starter can provide warmth and an emergency signal where fires are safe and legally permitted. Store them in a waterproof container and carry more than one ignition method.
However, starting a fire is not always appropriate. During dry conditions, wildfire restrictions may prohibit open flames, and wind can turn a small fire into a dangerous incident. An emergency bivy and insulating clothing are often safer, more dependable sources of warmth.
A small repair kit can also solve unexpected problems. Useful items include duct tape wrapped around a water bottle, cord, safety pins, zip ties, a compact multitool, and a needle with strong thread. These supplies can repair a torn backpack strap, secure a splint, reinforce damaged footwear, or help construct a simple shelter.
Choose a practical tool rather than an oversized “survival” knife. The best equipment is something you can carry comfortably, use safely, and access when needed.
What to Do When You Realize You Are Lost
Your behavior may matter as much as your equipment. Stop moving, breathe slowly, and confirm that you are genuinely off route. Check your map, compass, GPS position, recent landmarks, and the time remaining before sunset.
If you have communication, contact the local emergency service and provide your coordinates, trail name, last known location, clothing description, injuries, available shelter, and battery level. Follow the dispatcher’s instructions. Avoid repeatedly changing locations after sharing your coordinates unless remaining there presents an immediate danger.
Find a safe, visible place and address the most urgent risks first: serious injury, severe weather, dangerous temperature, and lack of shelter. Put on warm clothing before you become chilled, prepare shelter before darkness arrives, and use signals when you hear or see rescuers.
Before every hike, leave a trip plan with a dependable person. Include your route, trailhead, vehicle information, companions, planned return time, and the point at which they should contact authorities. Mount Rainier National Park advises hikers to carry the essentials even on short outings and always tell someone their travel plans so help can be requested if they fail to return. That simple preparation can start a search when you cannot call for help yourself.
Final Thoughts
The best hiking survival kit is not necessarily the most expensive or complicated one. It is a compact collection of reliable items you understand how to use: navigation, communication, signaling, shelter, insulation, light, water treatment, food, first aid, and basic repair supplies. Adjust the kit for local hazards, check it before each trip, and never let advanced equipment tempt you into ignoring worsening weather or exceeding your abilities.
Which of these hiking survival items do you already carry, and is there one essential piece of gear you would add to the list? Share your experience or favorite emergency item in the comments below—your suggestion may help another hiker prepare more safely.
Hi, I’m the creator and editor behind ZestyHabit. I research everyday safety, first aid, and practical wellness topics using official guidance and reliable public sources, then turn that information into clear, realistic steps for daily life.
My goal is to help readers make safer, better-informed choices at home and beyond.