
Field hockey is fast, low, and demanding. From the outside, it may look like a simple combination of running, passing, and hitting a ball with a stick. But once you play, you quickly realize how much the sport asks from your body.
You are often bent forward. Your knees are flexed. Your wrists are constantly adjusting the stick. You sprint, stop, turn, lunge, reach, tackle, and pass while trying to keep control of the ball. That low athletic posture is part of what makes field hockey exciting, but it is also why the back, knees, and wrists can get irritated if you are not careful.
Beginners and casual players are especially vulnerable because they may not yet have the strength, mobility, or technique to stay low safely. Even experienced players can develop discomfort when they train too much, use poor stick-handling habits, skip warm-ups, or play through fatigue.
The goal is not to make field hockey feel scary. The goal is to understand where the strain comes from and build habits that help you move better. With the right warm-up, posture, strengthening, equipment choices, and recovery, you can protect your body and enjoy the game with more confidence.
Why Field Hockey Can Strain the Back, Knees, and Wrists
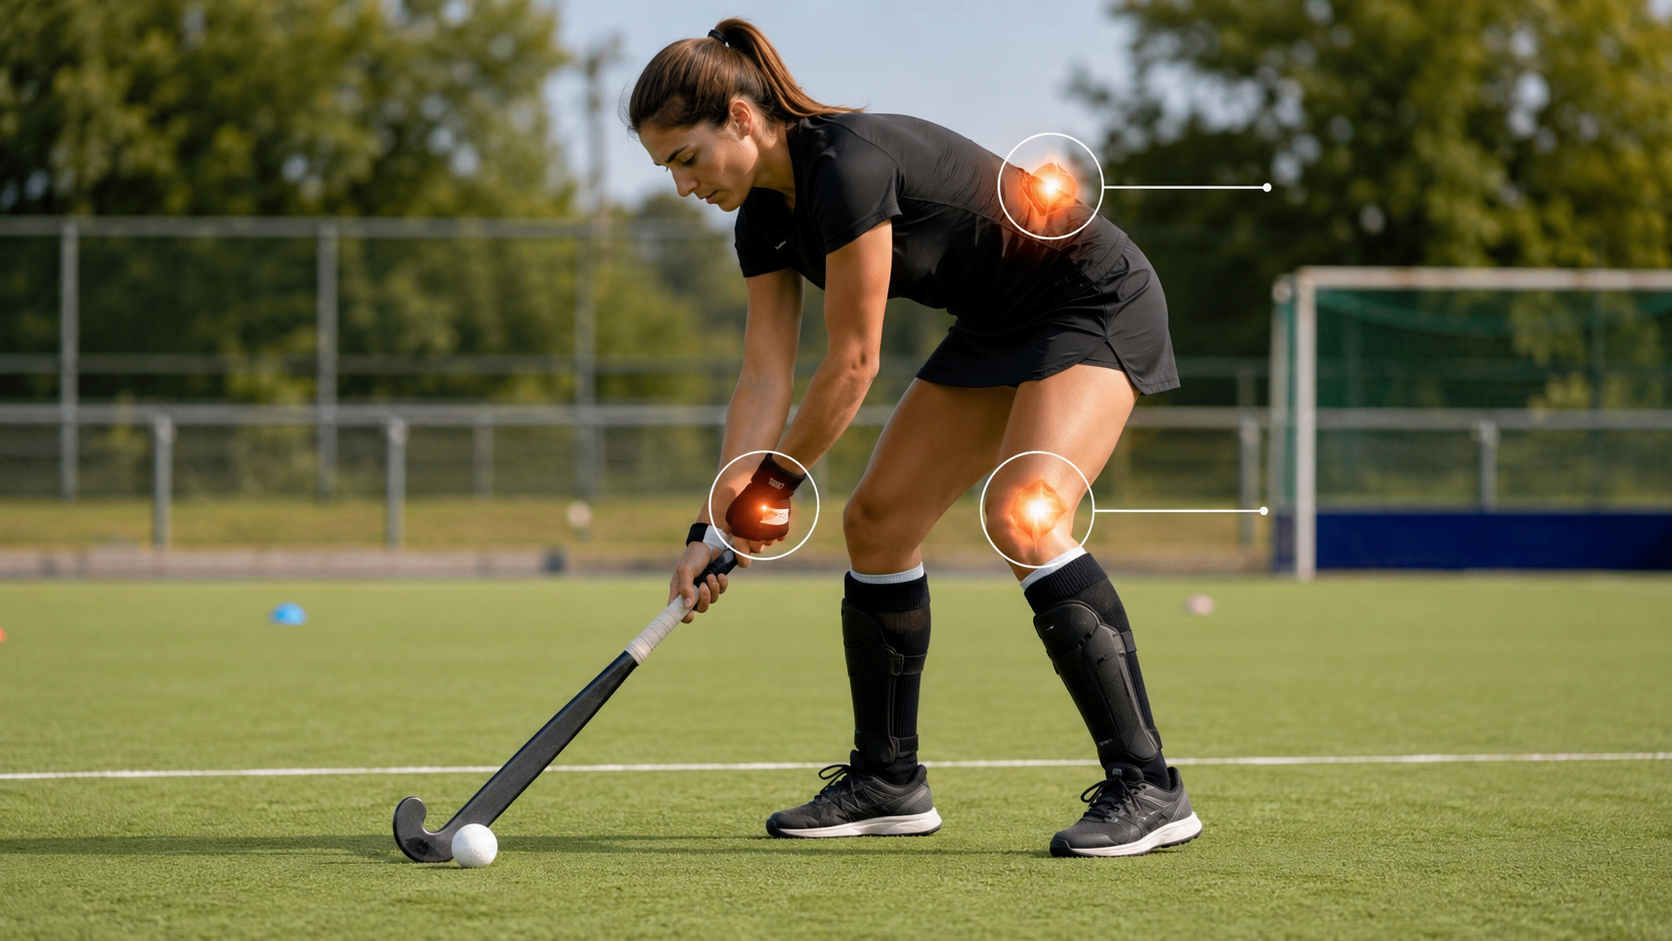
Field hockey has a unique body position. Unlike sports where players stay more upright, field hockey often requires you to bend forward while keeping your stick close to the ground. This puts repeated demand on the lower back, hips, thighs, knees, wrists, and shoulders.
The back can become strained when you bend mostly from the spine instead of hinging from the hips. The knees can become irritated from constant low positions, lunges, quick cuts, and sudden stops. The wrists can get sore from gripping the stick too tightly, repeatedly hitting, pushing, trapping, and changing direction with the stick.
The sport also involves asymmetry. Most players hold the stick the same way every time, rotate in similar patterns, and favor certain movements. Over time, that repeated one-sided movement can create tightness or imbalance.
Field hockey is also played at speed. A player may go from a bent dribbling position to a sprint, then stop suddenly, twist, and reach for the ball. When the body is tired or unprepared, those quick transitions can increase stress on the joints.
That is why injury prevention in field hockey is not only about avoiding contact. It is also about managing posture, technique, strength, and recovery.
Start With a Warm-Up That Matches the Sport
A slow jog alone is not enough for field hockey. Jogging raises your temperature, but it does not fully prepare your back, knees, hips, wrists, and shoulders for the low, twisting, stop-and-start movement of the game.
A good warm-up should gradually wake up the whole body. Start with light movement for 5 minutes. This can include jogging, skipping, side shuffles, backward running, or easy stick-and-ball movement.
Then add dynamic mobility. Focus on the hips, ankles, spine, shoulders, and wrists. Walking lunges, hip circles, leg swings, inchworms, arm circles, gentle torso rotations, and wrist circles can all help.
After that, move into field hockey-specific patterns. Practice low dribbling at an easy pace. Do short accelerations. Add controlled changes of direction. Practice a few light passes before harder hits.
The point is to build intensity step by step. Do not go from sitting or standing still into full-speed play. The lower back and knees especially need time to adjust to the low athletic position.
If your body feels stiff during the first few minutes of play, that is usually a sign your warm-up needs more movement, not just more time.
Protect Your Back by Learning to Hinge
The bent posture in field hockey is one of the biggest reasons players feel back strain. Many beginners bend by rounding the lower back. This may feel natural at first, but staying in that position repeatedly can make the back tired and sore.
A safer position usually comes from the hips. Think of pushing your hips slightly back while keeping your chest angled forward. Your knees should bend, but your spine should not collapse into a deep rounded curve.
This is often called a hip hinge. It allows your glutes, hamstrings, and hips to share the load instead of forcing the lower back to do everything.
You do not need a perfectly straight back at all times. Field hockey is dynamic, and your body will naturally move. But if your default posture is always rounded and tense, your back may complain.
A helpful cue is: “hips back, chest proud, stick low.” This keeps you athletic without folding completely from the waist.
You can practice this without a stick. Stand with your feet about hip-width apart, soften your knees, and push your hips back as if closing a car door with your hips. Keep your torso angled forward and your back long. Then return to standing. This basic movement carries over to field hockey posture.
Avoid Staying Low for Too Long Without Resetting
Field hockey requires low positions, but that does not mean you have to stay bent over every second.
Beginners sometimes crouch too low for too long because they think it makes them look ready. But holding a low position continuously can fatigue the back, hips, thighs, and knees. Once those muscles tire, your posture often gets worse.
Try to use low posture when the play requires it: defending, trapping, dribbling, tackling, or preparing to receive the ball. When the ball is away from you or play slows down, briefly reset your posture. Stand a little taller, loosen your shoulders, and breathe.
This small reset can reduce accumulated tension. It also helps you stay quicker because a tired crouch is not the same as an athletic ready position.
Good players are not low because they are frozen. They are low because they are ready to move.
Strengthen Your Core and Hips
Back protection in field hockey is not only about stretching. Strength matters.
Your core helps stabilize your torso while you bend, rotate, pass, and change direction. Your hips help you stay low without dumping all the pressure into your lower back and knees.
Useful exercises include planks, side planks, dead bugs, bird dogs, glute bridges, split squats, and Romanian deadlifts. These movements teach your body to control the spine and pelvis while the arms and legs move.
Side planks are especially helpful because field hockey includes a lot of side-to-side movement and rotation. Glute bridges and hip hinges help train the muscles that support the low playing posture.
You do not need heavy gym training to start. Bodyweight exercises done consistently can make a difference. The key is control. If you rush through exercises with poor form, you may simply repeat the same movement problems you are trying to fix.
For beginners, two or three short strength sessions per week can be enough to build a better foundation.
Take Care of Your Knees During Low Positions
The knees work hard in field hockey. You bend them to get low, use them to cut and stop, and rely on them during lunges and tackles.
Knee strain often increases when the knees collapse inward, twist awkwardly, or take too much load without help from the hips. This can happen when players are tired, weak in the glutes, or not paying attention to alignment.
When you are in a low stance, try to keep your knees generally tracking in the same direction as your toes. They do not have to be perfectly still, but they should not repeatedly cave inward during lunges, cuts, or stops.
Your hips should also help. If you bend only at the knees and keep your hips stiff, your knees may feel overloaded. A good athletic stance uses the hips, knees, and ankles together.
Lunges are common in field hockey, especially when reaching for the ball. When lunging, avoid letting the front knee shoot far inward or twist suddenly. Step with control, keep your foot planted, and use your leg muscles to push back out of the position.
If your knees feel sore after every practice, do not ignore it. Check your technique, shoes, playing surface, and training volume.
Practice Safer Cutting and Stopping
Field hockey involves quick changes of direction. These movements can stress the knees if your foot plants hard while the body twists over it.
A common risky pattern is planting the foot too far away from the body, keeping the leg stiff, and turning sharply. This can place extra strain on the knee.
To cut more safely, lower your center of gravity slightly, bend your knees and hips, and try to plant your foot closer to your body. Let your whole body turn, not just your knee. Your chest, hips, and feet should work together.
When stopping, avoid landing with locked knees. Use small steps to slow down when possible. A sudden hard stop with stiff legs can feel jarring, especially on artificial turf.
Practicing controlled cuts during training is helpful. Start slowly. Focus on soft knees, stable feet, and good body position. Then build speed gradually.
Players often practice stick skills but forget movement skills. In field hockey, both matter.
Choose Footwear That Supports Quick Movement
Your shoes affect your knees, ankles, and back more than you may realize. Field hockey involves sprinting, cutting, and low movement, so footwear should provide traction, support, and comfort for the playing surface.
Shoes that slip can cause awkward corrections. Shoes that grip too aggressively in the wrong way may make the foot stick while the knee turns. Shoes that lack support can make your legs work harder to stabilize.
For turf, use shoes designed for turf or field hockey when possible. For grass, appropriate cleats may be needed depending on the field conditions and league rules.
Make sure your shoes fit well. If your foot slides inside the shoe, your knees and ankles may lose control during fast movement. If the shoe is too tight, your foot may not move naturally.
Replace worn-out shoes when the tread is uneven, the sole feels unstable, or the upper no longer holds your foot securely.
Good footwear will not fix poor movement, but poor footwear can make good movement harder.
Protect Your Wrists With Better Grip Habits
The wrists are easy to overlook until they start hurting. In field hockey, they work constantly. They help control the stick, adjust the angle, trap the ball, pass, push, and shoot.
One common beginner mistake is gripping the stick too tightly. A tight grip may feel like control, but it can make your wrists, forearms, and shoulders tense. Over time, this can cause fatigue and discomfort.
Your grip should be secure but not rigid. You need enough control to guide the stick, but enough relaxation to move smoothly.
Pay attention to whether your forearms burn quickly during practice. That may be a sign you are overgripping. Shake out your hands between drills. Let your shoulders relax. Try to keep your movements fluid.
Stick handling should not feel like wrestling with the stick. The more relaxed and coordinated your hands become, the less strain your wrists usually feel.
Warm Up Your Wrists and Forearms
Most players warm up their legs but forget their wrists. That is a mistake in field hockey.
Before intense stick work, spend a minute or two preparing your wrists and forearms. Do wrist circles, gentle flexion and extension, finger open-and-close movements, and light stick rotations.
Start passing and dribbling gently before hitting hard. Just as your shoulder and back need gradual preparation, your wrists also need to build into higher force.
If your wrists feel stiff, do not immediately begin with powerful shots or repeated slap hits. Begin with controlled touches and passes.
After practice, gentle forearm stretching may help reduce tightness. Stretch both the palm-side and back-side of the forearm, but do not force painful positions.
Use the Right Stick Length and Condition
A stick that does not suit you can affect posture and wrist comfort.
If the stick feels too short, you may bend more than necessary, increasing back strain. If it feels too long or difficult to control, your wrist and shoulder mechanics may feel awkward.
Beginners should get guidance from a coach, experienced player, or knowledgeable shop when choosing a stick. Height, position, skill level, and comfort all matter.
Also check the grip. A worn, slippery grip may make you squeeze harder to control the stick. Replacing the grip can reduce unnecessary tension in your hands and wrists.
The stick should feel like an extension of your body, not a tool you are fighting against.
Be Careful With Hitting and Passing Volume
Repetitive hitting can strain the wrists, elbows, shoulders, and back, especially if your technique is not solid.
Beginners often practice power hits before they have good body mechanics. They may use too much wrist, too much lower back, or too much arm. This can create soreness quickly.
Start with controlled passing and pushing. Learn accuracy and clean contact before trying to hit harder. Power should come from coordinated body movement, not just the hands and wrists.
If you are doing a long practice session, mix your drills. Do not spend the entire time repeating hard hits. Alternate between passing, dribbling, footwork, defensive positioning, and lighter skills.
If your wrists or back start to feel irritated, reduce intensity and check your form.
Strengthen the Wrists and Forearms Gradually
Wrist strength can help with stick control, but it should be built gradually. Overdoing wrist exercises can cause irritation, especially if you are also practicing a lot.
Simple exercises include light wrist curls, reverse wrist curls, grip squeezes, and pronation-supination movements with a light object. Resistance bands can also be used for controlled wrist work.
The goal is not to create huge forearms. The goal is endurance and control. Field hockey requires repeated small adjustments, not just one maximum-effort movement.
Also remember that wrist comfort depends on the whole upper body. If your shoulders and upper back are weak or tense, your wrists may compensate. Rows, band pull-aparts, and shoulder stability exercises can support better stick handling.
Watch the Playing Surface
Field hockey is often played on turf, but surface conditions can vary. Wet turf, uneven grass, worn patches, or debris can affect your movement.
A slippery surface can increase the risk of falls and awkward knee positions. A sticky or high-friction surface can make turning harder. Uneven ground can affect your ankles, knees, and back because your body has to react quickly to unexpected changes.
Before practice, take a quick look at the field. During warm-up, notice how your shoes grip. Adjust your movement if the surface feels slick or unstable.
On wet surfaces, be extra careful with sudden stops and lunges. On hard surfaces, pay attention to impact and recovery.
Field awareness is part of injury prevention.
Do Not Ignore Fatigue
Fatigue changes posture. In field hockey, that matters a lot.
When you are tired, your back may round more. Your knees may collapse inward. Your footwork may slow down. Your wrists may grip harder because your body is trying to force control.
This is when strain often builds.
Pay attention to signs that your movement quality is dropping. If you are bending from your lower back instead of your hips, stumbling during cuts, missing simple traps, or feeling sharp discomfort, take a short break.
Conditioning can help over time. But during a game or practice, the smart move is to recognize fatigue before it turns into poor mechanics.
You do not need to stop every time you are tired. But you should know the difference between normal effort and losing control of your body.
Use Protective Gear Properly
Field hockey involves a hard ball, sticks, and fast movement, so protective gear matters.
Shin guards are essential. Mouthguards are commonly required and highly recommended. Gloves can help protect the hands and fingers, especially for players who defend low or handle the stick in tight spaces.
Some players use protective eyewear depending on league rules and personal preference. Goalkeepers need specialized protective equipment.
Make sure gear fits properly. Loose gear can shift and distract you. Gear that is too tight can restrict movement.
Protective gear does not make you invincible, but it gives you an added layer of safety while you build skill and confidence.
Pay Attention to Pain Signals
Some soreness after field hockey is normal, especially if you are new or returning after a break. But pain that is sharp, persistent, or changes how you move should not be brushed off.
Be careful with:
- Lower back pain that worsens while bending
- Knee pain during cutting, lunging, or stairs
- Wrist pain during stick handling or hitting
- Swelling around a joint
- Pain after a fall or collision
- Numbness, tingling, or weakness
- Pain that causes limping or altered posture
Rest may help mild irritation, but recurring pain usually has a reason. It may be technique, overuse, equipment, weakness, mobility limits, or training volume.
If pain does not improve or feels serious, get advice from a qualified medical or sports professional.
Cool Down and Recover After Playing
After practice or a game, your body needs time to shift out of high-intensity movement. A short cool-down can help reduce stiffness and make recovery smoother.
Walk for a few minutes. Then do gentle stretching for the hips, hamstrings, quads, calves, forearms, chest, and back. Keep it comfortable. This is not the time to force deep stretches.
Hydration matters, especially if you played in heat or sweat heavily. A balanced meal or snack with protein and carbohydrates can also support recovery.
If your wrists feel tight, gently move them through a comfortable range of motion. If your knees or back feel irritated, avoid adding extra intense workouts immediately after playing.
Sleep is another important recovery tool. Poor sleep can affect reaction time, coordination, and muscle repair.
A Simple Field Hockey Body-Protection Routine
You do not need a complicated program to start protecting your back, knees, and wrists. A simple routine done consistently can help.
Before playing, try:
- 5 minutes of light jogging or shuffling
- Hip circles and leg swings
- Walking lunges
- Arm circles and wrist circles
- Gentle torso rotations
- Easy dribbling
- Light passes before harder hits
- Controlled cuts and short accelerations
Two or three times per week, add:
- Glute bridges
- Side planks
- Bird dogs
- Split squats
- Step-downs
- Calf raises
- Band rows
- Light wrist and forearm exercises
After playing, do:
- Easy walking
- Gentle stretching
- Wrist and forearm relaxation
- Hydration
- Rest if joints feel irritated
The routine does not have to be perfect. It just needs to be regular enough that your body becomes better prepared for the sport.
Final Thoughts
Field hockey is a skillful, energetic, and exciting sport, but it places real demands on the body. The low playing posture can challenge the back. Quick cuts and lunges can stress the knees. Constant stick control can fatigue the wrists.
Most players do not need to avoid these movements. They need to prepare for them.
Warm up properly. Learn to hinge from the hips instead of collapsing through the lower back. Keep your knees controlled during low positions, cuts, and lunges. Use a relaxed but secure grip on the stick. Choose suitable shoes and equipment. Build strength in the hips, core, legs, wrists, and upper back. And most importantly, listen when your body gives you warning signs.
Good field hockey movement should feel athletic, not forced. The better your posture, control, and recovery habits become, the easier it is to play with confidence.
Protecting your back, knees, and wrists is not just about avoiding injury. It helps you move more smoothly, handle the stick better, and enjoy the game longer.
Hi, I’m the creator and editor behind ZestyHabit. I research everyday safety, first aid, and practical wellness topics using official guidance and reliable public sources, then turn that information into clear, realistic steps for daily life.
My goal is to help readers make safer, better-informed choices at home and beyond.


