How to Save a Knocked-Out Tooth: Emergency First Aid and Proper Tooth Storage
Minjin Park
·
A knocked-out tooth can turn an ordinary fall, sports collision, or playground accident into a frightening emergency. There may be blood, pain, and panic, but what happens during the first few minutes can significantly affect whether the tooth can be saved.
Dentists call a completely knocked-out tooth an avulsed tooth. This means the entire tooth has been displaced from its socket. A permanent tooth may sometimes be successfully replanted, but the chances are generally better when the tooth is handled correctly, kept moist, and treated immediately.
The most important rules are simple: determine whether the tooth is permanent or primary, hold it only by the crown, never scrub the root, keep it moist, and get emergency dental care without delay.
Dental injuries often happen during falls, vehicle crashes, sports collisions, or blows to the face. Before focusing on the tooth, make sure the injured person is conscious, breathing normally, and not experiencing a more serious medical emergency.
Confusion, repeated vomiting, or other possible signs of a head injury
Severe neck pain
Heavy bleeding that cannot be controlled
A visibly deformed jaw
Trouble opening or closing the mouth
Multiple facial injuries
A tooth or object that may have entered the airway
Do not attempt to place a tooth in the mouth of someone who is unconscious, extremely drowsy, confused, or unable to cooperate. The tooth could be swallowed or inhaled.
Once immediate medical dangers have been addressed, begin looking for the missing tooth. Move quickly, but remain calm enough to avoid damaging it.
Is It a Permanent Tooth or a Baby Tooth?
This is the most important distinction in knocked-out tooth first aid.
A permanent tooth should usually be replanted as quickly as possible when it is safe to do so. A baby tooth should not be replanted because placing it back into the socket may damage the developing permanent tooth underneath.
Children usually begin losing baby teeth around age six, but development varies. The front permanent teeth commonly emerge during the early elementary school years, so age alone cannot always confirm which type of tooth was lost.
Baby teeth are generally smaller and may appear whiter than permanent teeth. A naturally loosening baby tooth may have little or no visible root because the root has gradually dissolved. However, a baby tooth knocked out before it was ready to fall may still have a noticeable root.
If you cannot confidently determine whether the tooth is permanent, call an emergency dentist immediately and follow the dentist’s instructions. Do not force the tooth into the socket while guessing.
Locate the tooth as quickly as possible. Look around the site of the accident, inside clothing, and around the injured person’s mouth.
If you cannot find it, do not assume that it has simply been lost. A tooth may have been pushed completely into the gum rather than knocked out. It could also have been swallowed or, less commonly, inhaled.
A dentist may need to take X-rays to determine whether the tooth has been driven into the socket, fractured below the gumline, or lodged elsewhere. If the person begins coughing, wheezing, choking, or having difficulty breathing after the accident, seek emergency medical attention.
Collect any tooth fragments you find, even if the tooth appears badly damaged. A dentist may be able to use a fragment during treatment or restoration.
Step 2: Hold the Tooth by the Crown
Pick up the tooth by its crown, which is the white part normally visible above the gums. Do not hold it by the root.
The root surface is covered with delicate periodontal ligament cells that help the tooth reconnect with the surrounding tissues. Scraping, drying, disinfecting, or repeatedly touching the root can damage these cells.
Avoid the following mistakes:
Do not scrub the tooth with a toothbrush.
Do not scrape dirt away with a fingernail.
Do not wipe the root with a tissue or towel.
Do not apply soap, alcohol, bleach, or hydrogen peroxide.
Do not let the tooth dry on a countertop.
Do not wrap it in dry paper or cloth.
Even if the root looks dirty, resist the urge to make it perfectly clean. Gentle handling is more important than removing every speck of debris.
Step 3: Rinse the Tooth Gently if It Is Dirty
If the tooth is visibly contaminated, rinse it briefly and gently. The IADT guidelines recommend milk, saline, or the injured person’s saliva as suitable rinsing liquids.
If none of these are available, a brief rinse with clean running water may be used. Do not leave the tooth soaking in ordinary tap water for an extended period, because water is not an ideal storage medium for the root cells.
Hold the crown and allow the liquid to flow over the root. Do not scrub, brush, or rub it. Do not dry it afterward.
If the tooth looks relatively clean, you do not need to perform an elaborate cleaning process. The priority is getting the permanent tooth back into its socket or placing it in an appropriate storage liquid as soon as possible.
Step 4: Reinsert a Permanent Tooth When Possible
Immediate replantation gives a knocked-out permanent tooth its best opportunity for survival. If the injured person is conscious and cooperative, and you are certain it is a permanent tooth, try to place it back into the socket.
Use these steps:
Hold the tooth only by the crown.
Check which way the tooth normally faces.
Position the root over the empty socket.
Gently push the tooth into place using light finger pressure.
Do not force it if it will not slide into position.
Ask the person to bite gently on clean gauze or a folded cloth to hold it still.
Go directly to an emergency dentist.
The front surface of a tooth is usually flatter or slightly rounded, while the inner surface may be more curved. If you are unsure of the orientation, do not repeatedly rotate and manipulate the root. Place the tooth in an appropriate storage medium and get professional help.
Never use glue, adhesive, wire, or another homemade device to secure the tooth. A dentist will evaluate its position and apply a proper flexible splint if needed.
Reinsertion may not be appropriate if the socket is severely damaged, the tooth is fractured, the person cannot cooperate, or there is a risk that the tooth will be swallowed. When in doubt, preserve the tooth in liquid and call a dentist.
Step 5: Keep the Tooth Moist if Reinsertion Is Not Possible
A knocked-out permanent tooth should never be allowed to dry. Dehydration of the root surface begins within minutes, so choosing a storage method should not become a long debate.
The IADT lists suitable storage media in this general order:
A specialized tooth-preservation solution, such as Hank’s Balanced Salt Solution
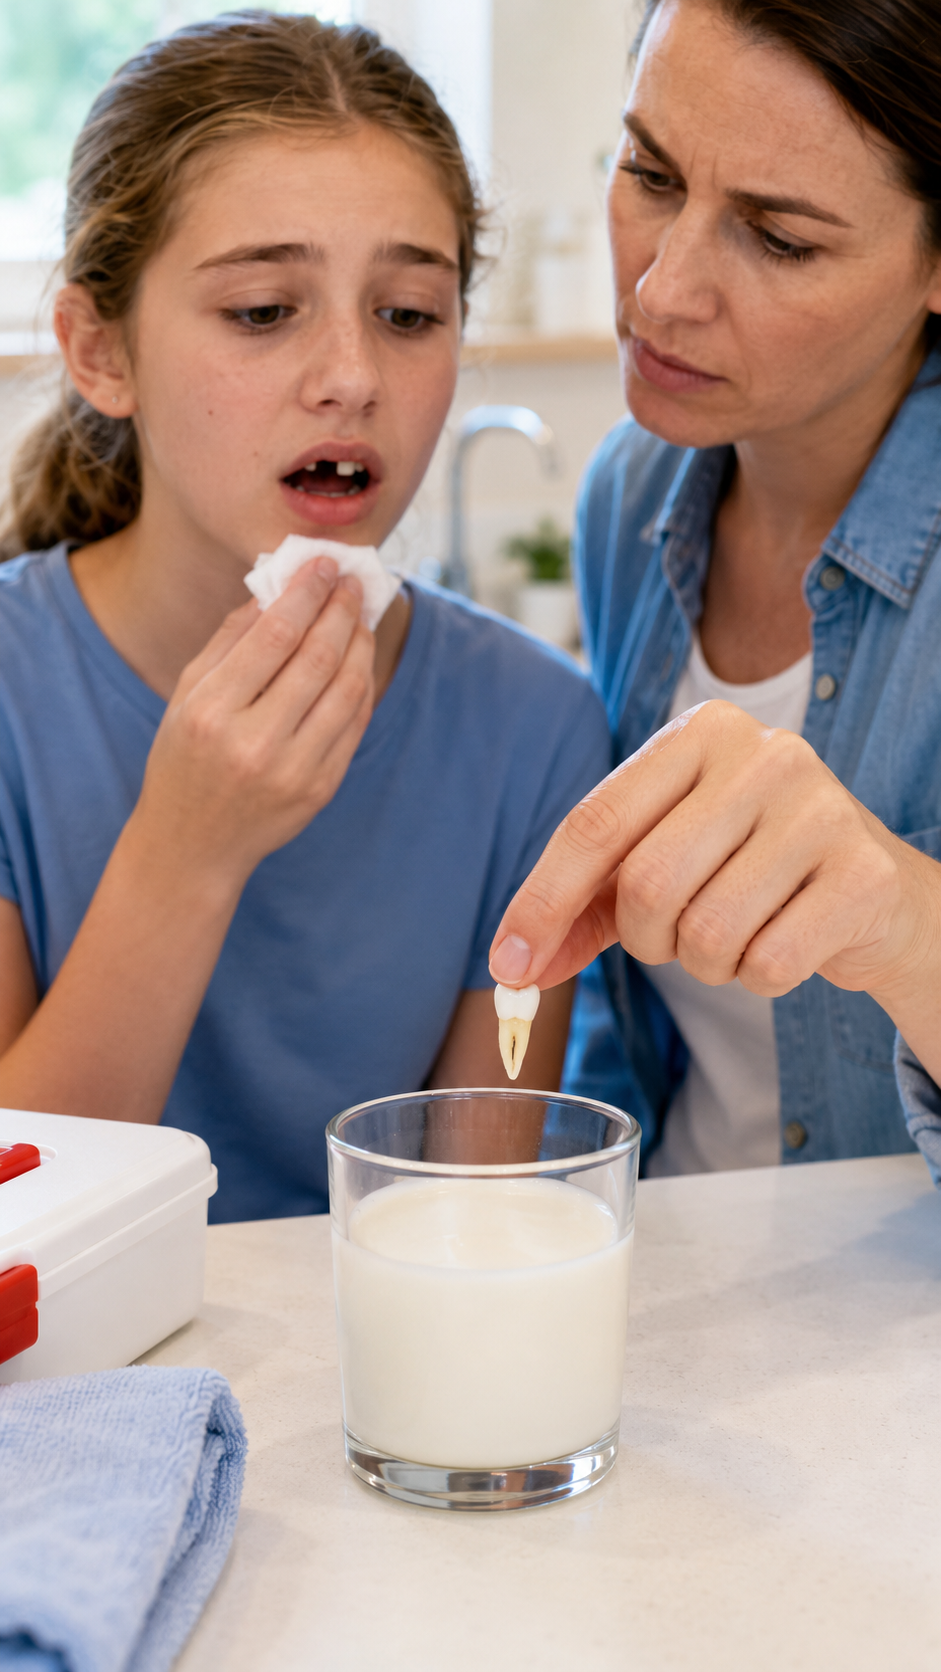
Cold milk
The injured person’s saliva in a clean container
Saline solution
Water only when nothing else is available
Milk is usually the most practical household choice. Pour enough into a clean cup or container to cover the entire tooth. Take the container and the injured person directly to a dentist.
A cooperative adult may be able to hold the tooth between the cheek and gum, but this method is inappropriate for a young child, anyone who is crying uncontrollably, or anyone at risk of swallowing or inhaling it. Placing the tooth in a container of saliva is safer in those situations.
Do not store a knocked-out tooth in juice, soda, alcohol, mouthwash, disinfectant, or plain ice. Do not freeze it.
If a baby tooth has been knocked out, you can still bring it to the dentist for identification, but do not place it back in the socket.
Step 6: Get to a Dentist as Quickly as Possible
A knocked-out permanent tooth is a true dental emergency. Contact the nearest dentist, pediatric dentist, endodontist, or emergency dental clinic while another person begins the first-aid steps.
Call before leaving if possible. Tell the clinic that a permanent tooth has been completely knocked out so the staff understands that immediate treatment is needed.
Even if more than an hour has passed, do not throw the tooth away or assume treatment is impossible. The long-term prognosis may be poorer after extended dry time, but a dentist may still recommend replantation for functional, cosmetic, developmental, or bone-preservation reasons.
If no dentist is available, an emergency department or urgent care center may help assess facial injuries and connect you with emergency dental services. However, definitive treatment generally requires a dental professional.
How to Control Bleeding and Swelling
Have the injured person gently rinse the mouth if necessary, but avoid forceful swishing. Place clean gauze over the empty socket and apply steady pressure by biting down gently.
Replace the gauze when it becomes soaked, but avoid repeatedly lifting it every few seconds to check the bleeding. Constantly disturbing the area can interfere with clot formation.
Place a cold pack wrapped in a thin towel against the outside of the cheek or lip to reduce swelling. Apply it for short intervals rather than placing ice directly against the skin.
For pain, use an age-appropriate over-the-counter pain reliever only if the person can normally take it safely. Follow the label or a healthcare professional’s instructions. Never place aspirin directly against the socket or gums because it can irritate the tissue.
Seek urgent medical care if bleeding remains heavy despite pressure, blood is interfering with breathing, or the person appears faint, pale, confused, or unusually weak.
What the Dentist May Do
The dentist will examine the socket, surrounding teeth, gums, jaw, and facial tissues. Dental X-rays may be taken to look for root fractures, bone injuries, foreign material, or teeth that have been pushed into the gum.
If the permanent tooth has already been replanted, the dentist will confirm its position. If it arrived in a storage container, the dentist may clean and reinsert it. The tooth is commonly stabilized to neighboring teeth with a flexible splint while the surrounding tissues heal.
Treatment may also involve:
Cleaning and treating cuts inside the mouth
Checking the injured person’s tetanus status
Considering antibiotics when clinically appropriate
Planning root canal treatment
Monitoring the tooth’s nerve and blood supply
Scheduling repeated follow-up examinations and X-rays
Replanting the tooth is only the beginning of treatment. Complications such as infection, root resorption, loss of pulp vitality, or fusion of the tooth to the surrounding bone can develop later. Keeping every follow-up appointment is essential, even if the tooth initially looks and feels normal.
Aftercare for a Replanted Tooth
Follow the dentist’s instructions carefully. Recommendations may vary depending on the person’s age, root development, socket injury, and time the tooth remained outside the mouth.
Typical aftercare may include eating soft foods, avoiding biting directly on the injured tooth, brushing gently with a soft toothbrush, and avoiding contact sports until the dentist approves a return.
Do not wiggle or repeatedly test the replanted tooth. Avoid hard, sticky, crunchy, extremely hot, or extremely cold foods if they cause discomfort. Take prescribed medication exactly as directed and do not use leftover antibiotics from another illness.
Contact the dentist if you notice increasing pain, swelling, fever, pus, a bad taste, significant tooth movement, or a change in the tooth’s color.
What if the Tooth Is Broken but Not Completely Out?
A cracked or broken tooth requires prompt dental care, but the first-aid steps are different from those for a completely avulsed tooth.
Rinse the mouth gently with clean water and collect any fragments. Keep the pieces moist in milk or saline and bring them to the dentist. Use clean gauze to control bleeding and a cold compress for swelling.
Do not attempt to glue the broken pieces back together. If a sharp edge is cutting the tongue or cheek, dental wax may provide temporary protection, but it should not delay professional treatment.
If the tooth is loose, pushed sideways, or partially displaced, leave it in place. Do not pull it out or repeatedly move it. A dentist may be able to reposition and stabilize it.
Preventing Knocked-Out Teeth
Not every accident can be prevented, but protective equipment can reduce the risk of severe dental trauma.
Children and adults who participate in contact sports, martial arts, skating, cycling, or activities with collision risks should use properly fitted protective gear. A custom-fitted mouthguard from a dentist generally offers better fit and retention than a loose, poorly fitted guard.
Wear seat belts, use age-appropriate child restraints, and avoid using teeth to open packages, crack nuts, or hold hard objects. At home, address slippery flooring, unstable furniture, and other fall hazards—particularly for young children and older adults.
A little preparation can also improve emergency response. Save the number of a local emergency dentist and consider keeping a commercial tooth-preservation kit in sports bags, school health offices, gyms, and first-aid kits.
A knocked-out permanent tooth does not always have to be lost forever, but successful treatment depends heavily on calm, immediate action. Remember the essential sequence: confirm that it is not a baby tooth, hold it by the crown, rinse it gently without scrubbing, reinsert it if safe, or store it in milk or another appropriate solution, and reach a dentist immediately. Have you ever dealt with a knocked-out or broken tooth, and did you know that milk could help preserve it? Share your experience or emergency dental tips in the comments below.
Hi, I’m the creator and editor behind ZestyHabit. I research everyday safety, first aid, and practical wellness topics using official guidance and reliable public sources, then turn that information into clear, realistic steps for daily life.
My goal is to help readers make safer, better-informed choices at home and beyond.