What to Do If You Fall Through Ice: A Step-by-Step Survival Guide
Minjin Park
·
A frozen lake can look solid enough to walk across, especially when its surface is covered with snow. But ice thickness and strength can change within a surprisingly short distance. One step may support you while the next drops you into near-freezing water.
Falling through lake ice is immediately dangerous, but it is not automatically fatal. Your response during the first moments can significantly affect your chances of getting out. The priorities are to keep your airway above water, control your breathing, return toward the ice that previously supported you, and spread your weight across the surface once you escape.
People standing nearby also need to know how to help without becoming additional victims. Running toward the hole or entering the water may turn one emergency into two.
This guide explains what to do if you fall through ice, how to assist another person safely, and how to manage cold-water exposure after the rescue.
Many people assume hypothermia is the first danger after falling through ice. In reality, cold-water shock can threaten your life before your core body temperature has time to fall significantly.
Sudden immersion can trigger an involuntary gasp followed by rapid, uncontrolled breathing. If your face is underwater when the gasp occurs, you may inhale water. Panic and hyperventilation can also make it difficult to think, speak, or coordinate an escape.
As exposure continues, cold water reduces muscle strength and coordination. Hands may become too numb to grip the ice, while wet clothing makes movement increasingly difficult. Hypothermia develops as the body loses heat faster than it can produce it, eventually causing confusion, exhaustion, slurred speech, drowsiness, and loss of consciousness.
This is why your first goal is not to remove clothing or retrieve equipment. It is to breathe, orient yourself, and get as much of your body out of the water as quickly as possible.
Step 1: Keep Your Head Above Water and Control Your Breathing
When you hit the water, fight the urge to thrash wildly. Your body may be gasping and breathing rapidly without your control.
Keep your mouth and nose above the surface. Concentrate on taking slower breaths, particularly long, controlled exhalations. If you are wearing a properly fitted life jacket or flotation coat, allow it to support you while you regain control.
Call for help as loudly as possible once you can breathe well enough to speak. Use a whistle if you are carrying one. A whistle requires less energy than repeatedly shouting and may be heard from farther away.
Do not dive underwater to recover a phone, fishing rod, ski, or other equipment. Remaining at the opening keeps your airway accessible and allows rescuers to locate you.
Step 2: Do Not Immediately Remove Your Winter Clothing
Heavy, wet clothing feels as though it should pull you down, but stripping it off wastes time and energy. Winter clothing may also trap air temporarily, providing some insulation and buoyancy.
The Minnesota Department of Natural Resources specifically advises people not to remove their winter clothing after falling through ice. Snowmobile suits and other insulated garments may provide especially useful flotation.
The exception would be equipment that is physically trapping or entangling you. Your primary objective remains keeping your airway clear and freeing your body sufficiently to escape.
Step 3: Turn Toward the Direction You Came From
In most situations, the strongest escape route is the one behind you.
Turn toward the direction from which you approached the hole. That ice supported your weight immediately before it broke, making it a better option than an unknown area in front of you.
Avoid repeatedly striking or climbing onto random edges. Thin ice may continue breaking under your hands. If a section collapses, move along the edge until you find ice that feels more solid, preferably on your original route.
If you are unsure where you came from, look for tracks, equipment, companions, or other signs indicating your path.
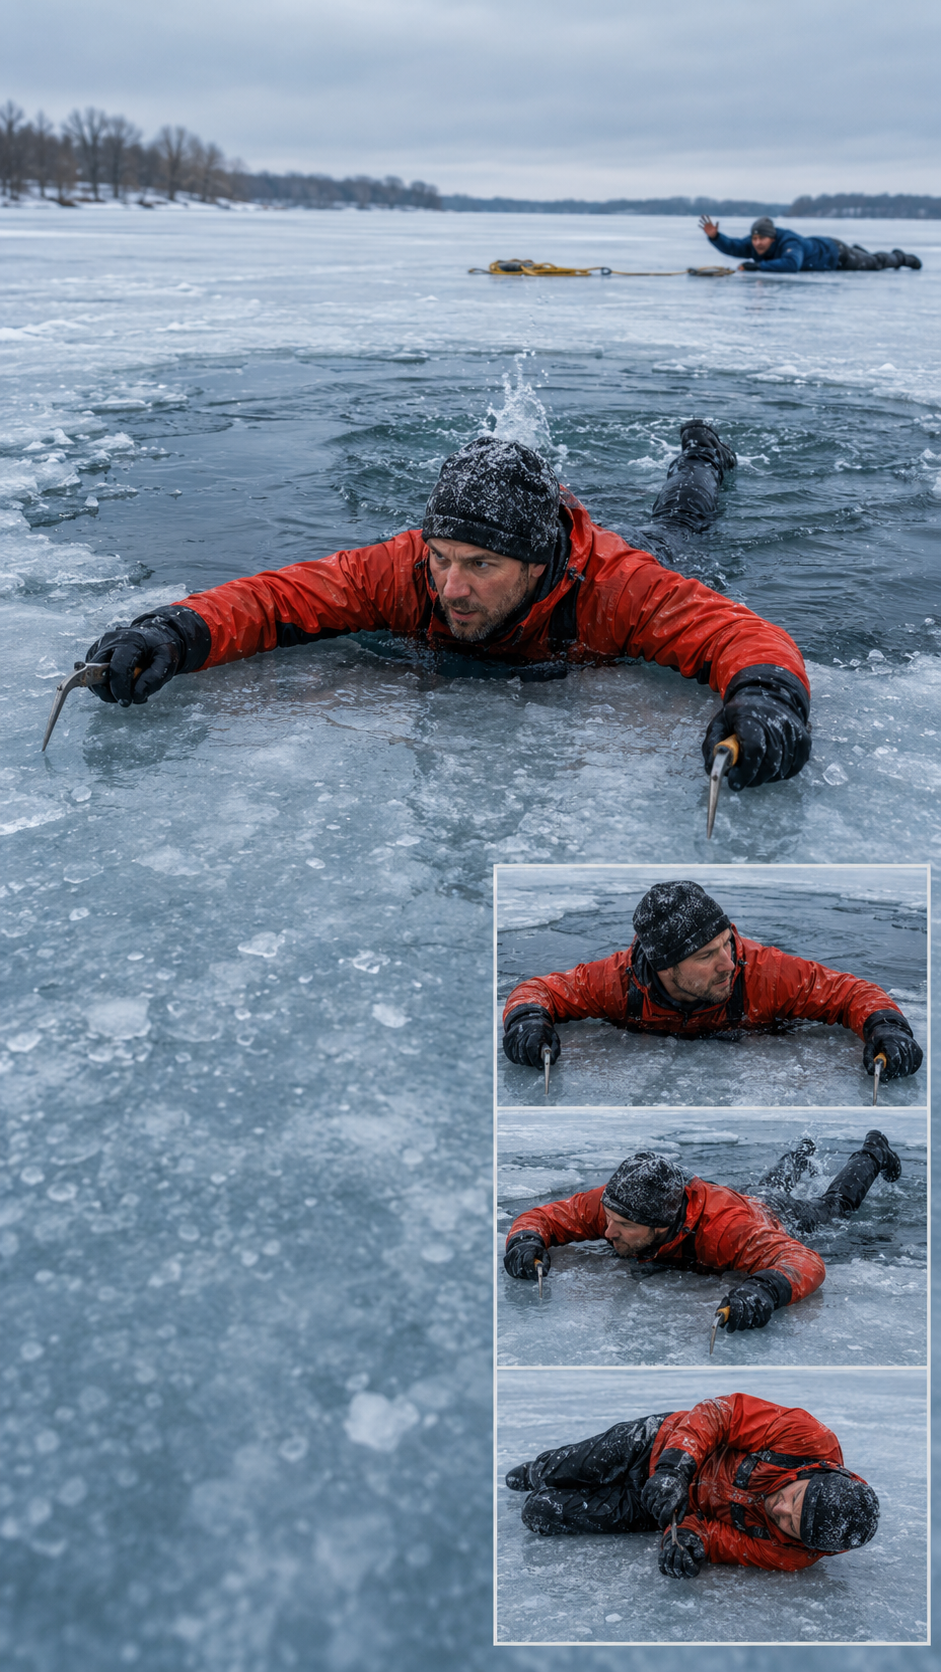
Step 4: Place Your Forearms on the Ice
Reach forward and place both hands and forearms flat on the unbroken surface. Spreading your arms distributes your weight more effectively than pushing down with your hands alone.
If you are carrying ice picks, grip one in each hand and dig the points into solid ice. Many ice picks are connected by a cord and worn around the neck so they remain accessible after a fall.
Do not try to perform a vertical pull-up. Lifting your entire waterlogged body straight upward wastes strength and places concentrated pressure on the ice edge.
Instead, think of sliding your body forward.
Step 5: Get Horizontal and Kick Hard
Allow your legs to rise behind you until your body is as horizontal as possible. Kick vigorously, similar to swimming, while pulling with your forearms or ice picks.
The kicking motion provides forward momentum and helps slide your chest and stomach onto the ice. Continue kicking until your hips and legs clear the water.
If your clothing has absorbed a great deal of water, the Minnesota DNR suggests briefly supporting your upper body on your elbows so some water can drain before you attempt to slide forward. Its complete step-by-step ice self-rescue guidance is available here.
Once most of your body is on the surface, avoid pushing yourself upright. Standing too soon places your full weight on a small area and may break the ice again.
Step 6: Roll Away From the Hole
Lie flat and roll away from the opening in the direction you originally came from. You can also crawl while keeping your body low and your legs spread, but rolling distributes your weight especially well.
Continue rolling or crawling until you are well beyond the weak area. Then carefully follow your original route toward shore. Do not take a shortcut across untested ice simply because it appears closer.
If another person is nearby, warn them not to run toward you. Ask them to remain on stronger ice and prepare a rope or other reaching aid if you need assistance.
What If You Cannot Pull Yourself Out?
Cold water can rapidly weaken your hands and arms. If repeated escape attempts are unsuccessful, focus on keeping your head above water and attracting attention.
Keep your forearms on the ice edge to support your upper body. Use a whistle, shout for help, and continue giving rescuers clear responses so they can locate and assess you. Avoid unnecessary thrashing, which consumes energy and may break additional ice.
If you have a phone in a waterproof pocket and can reach it without losing your grip, call 911 or activate its emergency function. Give your location as precisely as possible, including the lake name, nearest access point, visible landmarks, and your position relative to shore.
How to Rescue Someone Else Without Falling In
Your instinct may be to run toward the person, but the ice around the hole has already demonstrated that it cannot support normal weight. Entering the same area may leave both of you in the water.
Call 911 immediately. Put the phone on speaker so the dispatcher can provide instructions while you continue helping.
Use the following approach:
Talk
Tell the person to control their breathing, turn toward the direction they came from, place their arms on the ice, kick, and roll after getting out. Reassurance can reduce panic and help them follow the correct sequence.
Reach
From a secure position, extend a ladder, pole, tree branch, hockey stick, sled, or other long object. Lie flat to spread your weight and remain as far from the weak edge as possible.
Do not allow the person to grab your hand if doing so would pull you toward the opening.
Throw
Throw a rope, rescue bag, life jacket, or another buoyant object. Aim beyond the person so the rope lands within reach. If possible, secure your end of the rope to a solid object or have additional people hold it from a safe location.
Pull steadily rather than violently. Encourage the person to kick while being pulled horizontally over the ice.
Wait for Trained Rescuers
Do not enter the water unless you are a properly trained and equipped ice-rescue professional. Firefighters and rescue teams use protective suits, ropes, flotation devices, and specialized techniques. An unprotected bystander can become incapacitated within the same dangerous area.
If a pet falls through, do not walk onto weak ice to retrieve it. Animals sometimes escape on their own, while owners attempting rescues may fall through. Call emergency services or local animal-rescue authorities.
Move the person into a heated vehicle, building, or sheltered area as quickly and safely as possible. Remove wet clothing once dry coverings are available. Wrap the person in dry blankets, coats, towels, or a sleeping bag, including around the head and neck while keeping the face uncovered.
Warm the center of the body first—the chest, neck, head, and groin. Do not rub the arms or legs aggressively, place very hot objects directly against the skin, or put a severely cold person into a hot bath. Rewarming should be controlled, and anyone with moderate or severe hypothermia needs professional medical care.
A warm, nonalcoholic drink may be offered only if the person is fully awake and able to swallow normally. Do not give alcohol, and never give food or drink to someone who is unconscious or confused.
According to the CDC, warning signs of hypothermia include:
Intense shivering
Exhaustion
Confusion or memory problems
Fumbling hands
Slurred speech
Drowsiness
Loss of coordination
A body temperature below 95°F, or 35°C, is a medical emergency. The CDC advises handling someone with severe hypothermia gently and obtaining emergency assistance immediately. Read the CDC’s hypothermia first-aid recommendations.
What If the Person Is Not Breathing Normally?
If someone is unconscious and not breathing normally after being removed from the water, call 911 and begin CPR immediately, following the dispatcher’s instructions. Have another person retrieve an automated external defibrillator if one is available.
Drowning-related cardiac arrest is primarily caused by a lack of oxygen. Current American Heart Association guidance emphasizes CPR that includes rescue breaths as well as chest compressions. Trained rescuers should begin with two rescue breaths followed by 30 chest compressions. If you are untrained or unable to give breaths, chest-compression-only CPR is still reasonable until help arrives.
Anyone who inhaled water, lost consciousness, experienced breathing difficulty, or shows signs of hypothermia needs urgent medical evaluation, even if they appear to improve after the rescue.
A Real Incident at Glacier National Park
In February 2014, the National Park Service reported that two visitors fell through the ice on Lake McDonald in Montana’s Glacier National Park. They had been cross-country skiing when the ice gave way. Both were able to rescue themselves, although much of their equipment was lost.
Park officials explained that conditions across the lake varied from open water to slush and ice, sometimes within the same area. Cracks and unstable sections could be present, and conditions could change within hours.
No natural ice is completely safe. If you plan to ice fish, ski, snowmobile, or walk across a frozen lake:
Check current warnings and conditions with local authorities.
Never go alone, and tell someone where you are going.
Carry ice picks around your neck where you can reach them.
Wear a properly fitted life jacket or flotation coat.
Carry a whistle, throw rope, waterproof phone, and dry clothing.
Test ice thickness regularly with an auger, drill, or chisel.
Keep distance between group members rather than clustering together.
Avoid inlets, outlets, moving water, bridges, springs, cracks, slush, and vegetation.
Treat snow-covered ice cautiously because snow can hide weak areas and slow freezing.
Stay off ice during warming weather or after repeated thaw-and-freeze cycles.
Minnesota DNR guidelines recommend staying off new, clear ice less than four inches thick and list four inches as a minimum guideline for travel on foot. This is not a guarantee: ice may be two feet thick in one location and only an inch thick a short distance away. White ice is also significantly weaker than new, clear ice. Review the agency’s full ice-thickness guidance before venturing out.
The Bottom Line
If you fall through lake ice, keep your airway above water, control your breathing, leave your clothing on, and turn toward the direction you came from. Get horizontal, kick while pulling yourself onto the surface, and roll away without standing. If someone else falls in, call 911 and use a long object, rope, or flotation device from a safe position—never rush onto the weak ice. Once the person is out, treat the incident as a cold-water and possible drowning emergency, not simply an uncomfortable winter accident.
Have you ever walked, skied, or fished on a frozen lake, and do you normally carry ice picks or rescue equipment? Which step in this survival guide surprised you most? Share your thoughts or winter safety experiences in the comments so other readers can prepare before heading onto the ice.
Hi, I’m the creator and editor behind ZestyHabit. I research everyday safety, first aid, and practical wellness topics using official guidance and reliable public sources, then turn that information into clear, realistic steps for daily life.
My goal is to help readers make safer, better-informed choices at home and beyond.