Push-Up Precautions: How to Protect Your Wrists and Shoulders
Minjin Park
·
Push-ups are one of those exercises that look simple until you actually start paying attention to the details. They do not require equipment, they can be done almost anywhere, and they work several major muscle groups at once. Your chest, shoulders, triceps, core, and even your glutes all help you complete a clean push-up.
But because push-ups are so common, many people treat them casually.
They drop to the floor, place their hands wherever they feel natural, rush through a few reps, and assume any discomfort is just part of the workout. Then the wrists start aching. The shoulders feel pinchy. The lower back sags. The neck tightens. Suddenly, an exercise that was supposed to build strength becomes something the body does not enjoy.
Push-ups are useful, but they still need good technique. Small changes in wrist angle, shoulder position, hand placement, and core tension can make the difference between a strong, controlled movement and one that irritates your joints.
The goal is not to make push-ups feel intimidating. It is to help you do them in a way that protects your wrists and shoulders, so you can build strength without unnecessary pain.
A push-up places a lot of body weight through the hands. That means your wrists are loaded in an extended position, with your palms flat on the floor and fingers pointing forward. If your wrists are stiff, sensitive, or not used to that angle, discomfort can show up quickly.
Your shoulders also work hard during push-ups. They have to support your body, control the lowering phase, and help press you back up. If your shoulders are shrugged, flared, unstable, or moving too far forward, the movement can feel uncomfortable or even painful.
The good news is that push-ups are highly adjustable. You can change the angle, surface, hand position, and difficulty level to make them safer and more comfortable.
Start with Your Hand Placement
Hand placement sets the foundation for the entire push-up.
A common beginner mistake is placing the hands too wide or too far forward. This can make the shoulders feel strained and reduce control. Instead, place your hands slightly wider than shoulder-width, with your wrists roughly under your shoulders.
Your fingers should spread comfortably on the floor. Think of pressing through the full hand, not just the heel of the palm. The base of your index finger, thumb, and outer palm should all make contact with the floor.
This helps distribute pressure more evenly. If all your weight sinks into the wrist crease, your wrists may feel overloaded. If you actively press through your fingers, the hands become more stable.
A useful cue is to imagine gently gripping the floor with your fingertips. You are not clawing aggressively, but you are creating enough tension to keep the hand active.
Watch Your Wrist Angle
Wrist discomfort is one of the most common complaints during push-ups. Some people feel pressure at the front of the wrist. Others feel a sharp stretch or dull ache after a few reps.
A little stretch may be normal if you are not used to loading your wrists, but pain is not something to ignore.
To protect your wrists, avoid letting your body weight collapse passively into your palms. Press the floor away and keep your fingers active. Make sure your hands are not too far in front of your shoulders, because that can increase pressure.
If flat-hand push-ups bother your wrists, try modifying the position. You can use push-up handles, dumbbells with stable flat sides, or a folded exercise mat under the heel of the palm. These options reduce wrist extension and may feel more comfortable.
You can also do push-ups on your fists if your knuckles tolerate it and the surface is padded enough. However, this is not comfortable for everyone, so do not force it.
Warm Up Your Wrists First
Wrists are often forgotten during warm-ups. People may warm up their chest or shoulders, but then expect their wrists to handle body weight immediately.
Before push-ups, spend a minute preparing your wrists.
Try gentle wrist circles, palm pulses, or rocking movements on hands and knees. You can place your hands on the floor and gently shift your weight forward and back, keeping the movement small and controlled.
You can also stretch the forearms lightly by extending one arm forward and gently pulling the fingers back with the other hand. Keep it mild. The goal is not to force flexibility. It is to make the wrists feel awake and ready.
If your wrists feel stiff, start with an easier push-up variation instead of jumping into full floor push-ups.
Keep Your Shoulders Away from Your Ears
Shoulder position matters more than many people realize.
During a push-up, your shoulders should feel stable, not jammed up toward your ears. When the shoulders shrug, the neck and upper traps often take over. This can make the movement feel tense and reduce control around the shoulder joint.
Before starting, set your body in a strong plank position. Press the floor away slightly so your upper back feels supported. Your shoulder blades should not be squeezed tightly together, but they also should not collapse.
As you lower, let the shoulder blades move naturally around the ribcage. As you press up, push the floor away and keep the neck long.
A helpful cue is: “long neck, strong shoulders.” If your neck disappears between your shoulders at the top of the movement, reset your position.
Avoid Flaring Your Elbows Too Much
Elbow position affects shoulder comfort.
Many people perform push-ups with their elbows sticking straight out to the sides, forming a T-shape. This can place extra stress on the shoulders, especially if the person lacks control or mobility.
Instead, let your elbows angle slightly back from your body. They do not need to be glued to your ribs, but they should not flare directly out either. A natural angle of about 30 to 45 degrees from the torso often feels better for most people.
This position usually helps the chest, triceps, and shoulders work together more smoothly.
When lowering, think of your elbows pointing diagonally back rather than straight sideways. When pressing up, keep the same path instead of letting the elbows drift outward.
Keep Your Core Tight
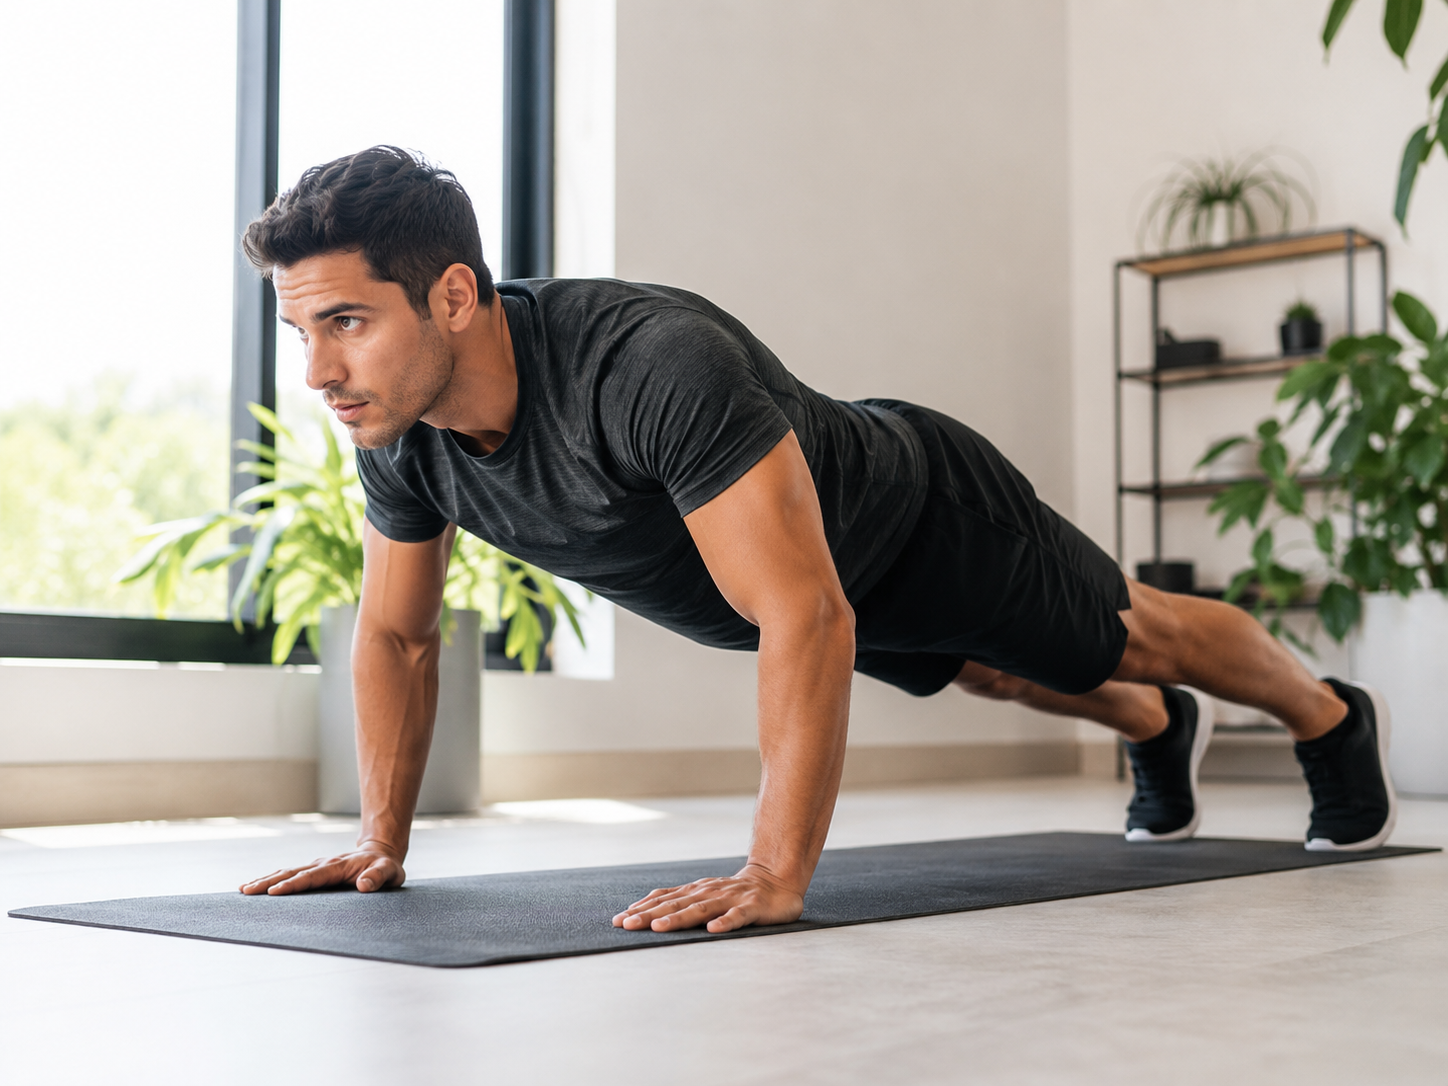
A push-up is not just an upper-body exercise. It is a moving plank.
If your core is loose, your lower back may sag toward the floor. This changes the angle of the exercise and can make your shoulders and wrists carry more awkward pressure.
Before each set, brace your core gently. Think of pulling your ribs and pelvis toward each other. Squeeze your glutes lightly. Your body should form a straight line from head to heels.
Avoid letting your hips drop as you get tired. Also avoid lifting your hips too high into a pike position unless you are intentionally doing a modified version.
A clean push-up should move your body as one unit. Your chest, hips, and thighs should lower and rise together. If your chest moves first and your hips lag behind, the variation may be too difficult for now.
Do Not Drop Too Low Without Control
Range of motion is important, but it should be controlled.
Some people lower until their shoulders roll forward or their chest collapses. Others bounce at the bottom to get back up. This may look like a deeper push-up, but it can irritate the shoulders.
Lower only as far as you can while keeping good alignment. For some people, that may be chest close to the floor. For others, especially beginners, it may be halfway down.
Depth should improve gradually as strength and control improve.
If your shoulders feel pinchy at the bottom, shorten the range of motion. You can place a yoga block, folded towel, or cushion under your chest as a target. Touch it lightly, then press back up.
This gives you a consistent depth without forcing your body lower than it can control.
Use Incline Push-Ups When Needed
Incline push-ups are one of the best ways to learn proper form.
Instead of placing your hands on the floor, place them on a bench, sturdy table, countertop, or wall. The higher your hands are, the easier the exercise becomes. This reduces the amount of body weight going through your wrists and shoulders.
Incline push-ups are not “fake” push-ups. They are a smart progression. They allow you to practice hand placement, elbow angle, shoulder control, and core tension without struggling through poor reps.
As you get stronger, gradually lower the surface. You might move from a wall to a countertop, then to a bench, then to the floor.
This approach is often much safer than forcing full push-ups before your body is ready.
Be Careful with Knee Push-Ups
Knee push-ups can be helpful, but they are not always the best option for everyone.
They reduce the amount of body weight you press, which can make the movement easier. However, some people still let their hips sag, shoulders shrug, or elbows flare. If that happens, the same wrist and shoulder problems can still appear.
If you use knee push-ups, keep your body in a straight line from head to knees. Do not bend only at the hips. Keep the core engaged and lower your chest as one unit.
For many people, incline push-ups are actually better for building full push-up form because they keep the whole-body plank pattern more naturally.
Move Slowly Enough to Stay Honest
Fast push-ups can hide poor form.
When you rush, it becomes harder to notice whether your elbows are flaring, your wrists are collapsing, or your shoulders are shrugging. Momentum helps you complete reps, but it does not always build good control.
Try slowing down slightly. Lower with control, pause briefly if you can, then press back up smoothly.
You do not need to move in slow motion, but the weight of your body should never feel like it is falling. A controlled push-up is usually safer and more effective than a rushed one.
If slowing down makes the exercise impossible, use an easier variation.
Do Not Chase High Reps Too Soon
Push-ups are often treated like a numbers challenge. People want to do 20, 50, or 100. There is nothing wrong with having a goal, but chasing high reps too early can lead to messy form.
Once fatigue sets in, wrists may collapse, elbows may flare, and shoulders may lose stability. The last few reps may look nothing like the first few.
Quality matters more than the total count.
Instead of doing as many as possible with poor form, try sets of clean reps. For example, three sets of six good incline push-ups are more useful than one set of twenty sloppy floor push-ups.
Stop the set when your form starts breaking. That is not quitting. That is training intelligently.
Strengthen the Supporting Muscles
If push-ups bother your shoulders, the issue may not only be the push-up itself. Your supporting muscles may need more strength.
Helpful exercises include:
Planks
Shoulder taps
Scapular push-ups
Dumbbell rows
Wall slides
External rotations with a light band
Dead bugs
Glute bridges
These exercises support better control through the core, upper back, and shoulder stabilizers.
Scapular push-ups are especially useful. In a plank position, keep your elbows straight and move only your shoulder blades: let your chest sink slightly, then press the floor away. This teaches shoulder blade control without doing a full push-up.
If you are new to strength training, keep these exercises light and controlled.
Pay Attention to Your Neck and Head Position
The neck is easy to forget during push-ups.
Some people crane their head forward to reach the floor. Others tuck the chin too hard or look straight ahead. These habits can create neck tension and affect shoulder position.
Keep your neck neutral. Look slightly ahead of your hands or down at the floor. Your head should move with your body, not lead the movement.
Imagine holding a small orange under your chin. Not squeezed tightly, not dropped completely. This cue can help keep the neck long and relaxed.
Choose the Right Surface
The surface you use can affect your wrists.
A very hard floor may feel uncomfortable on the palms or knuckles. A very soft surface, like a thick mattress, may make your hands unstable and force your wrists to work harder.
A yoga mat, exercise mat, or firm carpet usually works well. If your wrists are sensitive, a folded towel under the palms may help, but avoid making the surface so soft that your hands wobble.
If you use dumbbells as handles, make sure they are stable and will not roll. Hex-shaped dumbbells are usually safer than round ones for this purpose.
Know When to Stop
Some discomfort during exercise may come from effort, but joint pain deserves attention.
Stop or modify push-ups if you feel:
Sharp wrist pain
Pinching in the front of the shoulder
Numbness or tingling in the hand
Pain that gets worse with each rep
A feeling of instability in the shoulder
Wrist pain that lingers after the workout
Neck pain or headaches after push-ups
Do not force push-ups just because they are a basic exercise. There are many ways to build upper-body strength. If regular push-ups do not suit your body right now, incline push-ups, chest presses, resistance band presses, and machine presses can all be useful alternatives.
If pain is persistent, severe, or related to a previous injury, it is wise to consult a qualified professional.
A Simple Push-Up Checklist
Before your next set, run through this quick checklist:
Hands slightly wider than shoulder-width
Fingers spread and pressing into the floor
Wrists comfortable, not collapsed
Shoulders away from ears
Elbows angled slightly back
Core braced
Glutes lightly engaged
Body moving as one line
Neck neutral
Reps controlled, not rushed
You do not need to obsess over every detail forever. But reviewing these points can help you build better habits.
Final Thoughts
Push-ups are simple, but they are not mindless. They require strength, control, and awareness from the wrists, shoulders, core, and upper body.
If your wrists or shoulders hurt during push-ups, do not ignore it and push harder. Adjust your hand position, check your elbow angle, engage your core, slow down, and use an easier variation when needed. Incline push-ups are often the smartest place to build clean form.
The best push-up is not the one that looks the hardest. It is the one you can perform with control, comfort, and consistency.
Protect your wrists and shoulders now, and push-ups can stay in your routine for a long time.
Hi, I’m the creator and editor behind ZestyHabit. I research everyday safety, first aid, and practical wellness topics using official guidance and reliable public sources, then turn that information into clear, realistic steps for daily life.
My goal is to help readers make safer, better-informed choices at home and beyond.