Deadlift Precautions: How to Protect Your Lower Back While Lifting
Minjin Park
·
The deadlift is one of those exercises that looks simple until you actually try to do it well. You pick something up from the floor, stand tall, and put it back down. That is the basic idea. But because the deadlift uses so much of your body at once, small mistakes in setup, posture, breathing, or load choice can quickly show up as lower back discomfort.
For beginners, the deadlift can feel intimidating. You may have heard that deadlifts are dangerous for the back. You may have seen people lifting heavy weights and wondered if the exercise is only for advanced lifters. The truth is more balanced.
A deadlift is not automatically bad for your back. In fact, when learned properly, it can help build strong glutes, hamstrings, back muscles, grip, and overall body control. But it does require respect. The lower back should not be treated like the main engine of the lift. It should stay strong and stable while the hips and legs do most of the work.
If you are new to deadlifting, the goal is not to lift the heaviest weight possible. The goal is to learn how to hinge, brace, control the bar, and move with good alignment. This guide covers practical deadlift precautions to help protect your lower back while lifting.
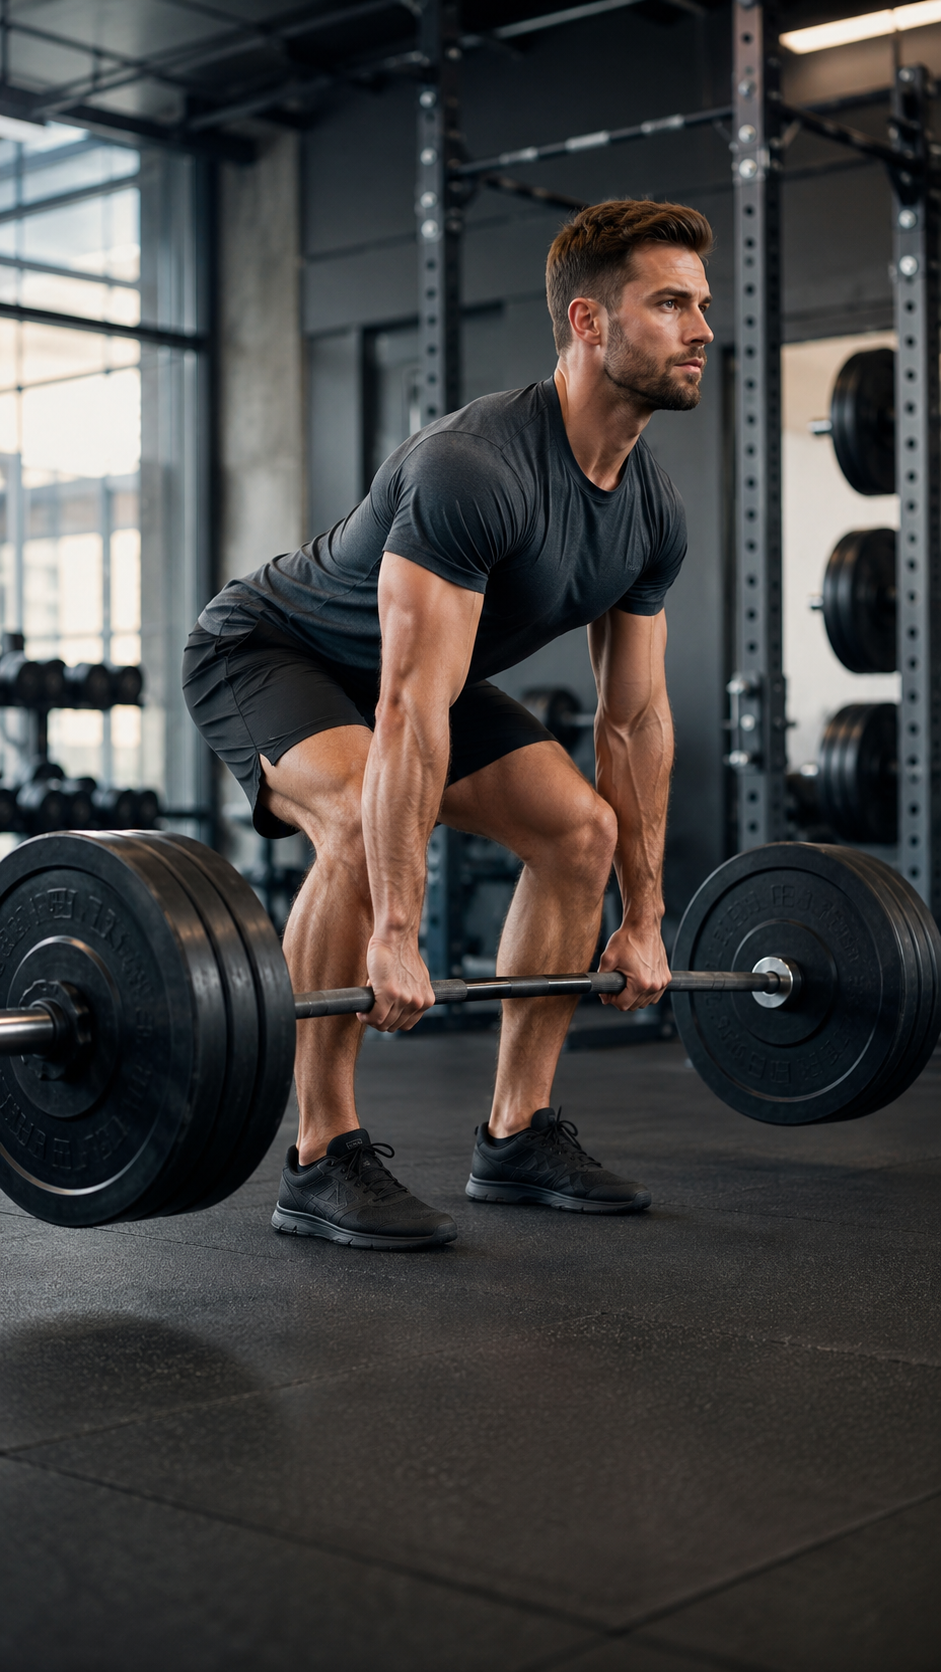
A deadlift is a hip hinge movement. That means the main action comes from pushing the hips back, then driving them forward to stand up.
Many beginners accidentally turn the deadlift into a lower back lift. They bend over, round the spine, pull with the arms, and try to “yank” the weight off the floor. That is where problems often begin.
In a safer deadlift, your body works more like this:
Your feet stay planted. Your hips move back. Your spine stays steady. Your core braces. Your legs and hips push the floor away. Your glutes finish the lift.
Your lower back is involved, but it should not be doing everything. Think of it as part of a strong support system, not the main mover.
Start with the Hip Hinge Before Using Heavy Weight
Before loading a barbell, learn the hip hinge pattern. This is the foundation of a good deadlift.
A hip hinge is different from a squat. In a squat, the knees bend more and the hips drop down. In a hinge, the hips move backward while the torso leans forward with a neutral spine.
A simple way to practice:
Stand with your feet about hip-width apart. Place your hands on your hips. Soften your knees slightly. Push your hips back as if closing a car door with your hips. Keep your chest from collapsing. Feel a stretch in your hamstrings. Drive your hips forward to stand tall again.
You can also practice with a broomstick or dowel along your back. Try to keep contact with the back of your head, upper back, and tailbone as you hinge. This helps you notice if your spine is rounding too much.
Spend time on this pattern. A clean hip hinge makes deadlifting feel smoother and helps reduce unnecessary stress on the lower back.
Keep Your Back Neutral, Not Overarched
One of the most important deadlift precautions is maintaining a neutral spine. Neutral does not mean perfectly straight like a metal rod. It means your spine keeps its natural curves without excessive rounding or overextending.
Beginners often hear “keep your back straight” and respond by aggressively arching the lower back. That can also create discomfort. You do not want a rounded back, but you also do not want to crank your lower back into a hard arch.
A better cue is: ribs down, spine long, chest open.
Before lifting, imagine your torso as a strong cylinder. Your ribs, pelvis, and core should work together. If your ribs flare up and your lower back overarches, you may lose that stacked, stable position.
Signs your back position may need work:
Your lower back rounds as soon as you reach for the bar
Your hips shoot up before the weight moves
You feel the lift mostly in your lower back
Your ribs flare upward at the top
You lean back hard to finish the rep
Your back feels strained after light sets
A neutral back should feel strong, controlled, and repeatable.
Learn How to Brace Properly
Bracing is one of the most useful skills for protecting your lower back while deadlifting. It means creating tension around your midsection before and during the lift.
Bracing is not the same as simply sucking in your stomach. It is closer to preparing your body to take a gentle punch to the stomach. Your abdomen, sides, and lower back all become firm.
Try this before a rep:
Take a breath into your belly and sides. Gently tighten your core all around. Keep your ribs from flaring. Hold that tension as you begin the lift. Exhale after passing the hardest part or once you finish the rep.
For light weights, you do not need an extreme brace. But you should still learn the habit. As the load gets heavier, bracing becomes more important.
A lifting belt can help advanced lifters brace against pressure, but it does not replace core control. Beginners should learn to brace without depending on a belt first.
Set Up Close to the Bar
Bar position matters. If the bar starts too far away from your body, it pulls you forward. That can make your lower back work harder and make the lift feel heavier than it needs to.
For a traditional barbell deadlift, start with the bar close to the middle of your foot. When you look down, the bar should be over your shoelaces, not far out in front of your toes.
When you grip the bar, your shins may lightly touch it or come very close. As you lift, the bar should travel close to your body.
A common beginner mistake is letting the bar drift forward. The farther the weight moves from your center of gravity, the more strain you may feel through the back.
Think: keep the weight close.
This applies to dumbbells and kettlebells too. Do not reach far forward to pick them up. Position the weight close enough that you can hinge and lift without overreaching.
Do Not Start Too Heavy
The deadlift can make people ambitious. Because it uses large muscles, you may be able to move more weight than you expected. But just because the weight moves does not mean your technique is ready for it.
Beginners should start lighter than their ego wants.
Use a weight that allows you to:
Keep your back position stable
Brace before each rep
Move the weight smoothly
Keep the bar close
Feel your hips and legs working
Avoid jerking from the floor
Stop before form breaks down
Your first deadlift sessions should feel like practice, not a max-strength test.
A good rule: leave a few reps “in the tank.” If you could only complete one more rep with shaky form, the set is probably too heavy for your current skill level.
Control the Weight on the Way Down
Many people focus only on lifting the weight up, then drop or collapse on the way down. But the lowering phase matters too, especially for lower back safety.
To lower the weight:
Stand tall at the top. Push your hips back first. Keep the weight close to your legs. Let your knees bend after the weight passes them. Set the weight down with control.
Avoid squatting the weight down from the top immediately. Also avoid rounding forward and letting the weight pull you toward the floor.
The descent should look like the lift in reverse. Controlled lowering helps reinforce the hip hinge and keeps you from losing position between reps.
Do Not Yank the Bar Off the Floor
A deadlift should begin with tension, not a sudden jerk.
Before the weight leaves the ground, take the slack out of your body and the bar. This means creating full-body tension: grip the bar, brace your core, set your lats, push your feet into the floor, and then lift.
If you yank the bar suddenly, your hips, back, and shoulders may be pulled out of position. This can make the lift feel rough and increase the chance of discomfort.
Think of the start as a smooth push, not a violent pull.
A useful cue is: push the floor away.
This helps you use your legs and hips instead of trying to rip the bar up with your arms and lower back.
Engage Your Lats
Your lats are the large muscles along the sides of your back. They help keep the bar close to your body and support a stronger upper-body position.
Beginners often forget about the lats because they are focused on the legs and lower back. But when the lats are loose, the bar may drift forward.
Before lifting, imagine squeezing oranges under your armpits or pulling your shoulder blades gently down toward your back pockets. Your arms should stay long, but your upper back should feel active.
Do not shrug the bar. Do not bend your elbows to pull. The arms are like strong hooks. The body does the lifting.
Avoid Overextending at the Top
At the top of the deadlift, your job is to stand tall, not lean backward.
Some beginners finish the lift by pushing the hips too far forward and arching the lower back. This dramatic “lockout” can irritate the back over time.
A clean finish looks simple:
Stand tall. Squeeze your glutes. Keep your ribs down. Keep your spine neutral. Do not lean back.
The rep ends when your hips and knees are extended and your body is upright. There is no need to exaggerate the movement.
Choose the Right Deadlift Variation
Not everyone needs to start with a straight barbell deadlift from the floor. Depending on your mobility, body proportions, strength, and confidence, another variation may be a better starting point.
Beginner-friendly options include:
Kettlebell deadlift
Dumbbell deadlift
Trap bar deadlift
Romanian deadlift
Rack pull
Block pull
A trap bar deadlift can feel more natural for many beginners because the weight is centered around the body instead of in front of it. A kettlebell deadlift can also be a great way to learn the hinge with lighter load and simpler setup.
If you cannot reach the bar from the floor without rounding your back, raise the weight. Use blocks, plates, or a rack setting that lets you keep a better position. You can gradually lower the starting height as your hinge and mobility improve.
Warm Up Before Your Working Sets
Do not walk into the gym and start deadlifting heavy right away. Your hips, hamstrings, glutes, core, and back need preparation.
A simple deadlift warm-up might include:
5 minutes of easy walking, cycling, or rowing
Hip hinges without weight
Glute bridges
Bodyweight good mornings
Light kettlebell deadlifts
Gradual warm-up sets with the bar
Your warm-up sets should slowly prepare your body for the working weight. For example, if your work set is moderate, do several lighter sets first.
The goal is not to exhaust yourself. The goal is to practice the movement and build readiness.
Watch Your Foot Position
Your feet create the base of the deadlift. If your stance is unstable, the rest of the lift may feel off.
For a conventional deadlift, many beginners do well with feet about hip-width apart. Toes can point slightly outward, but they should not be extremely turned out unless that matches your body and setup.
Pressure should stay balanced through the foot. Avoid rolling onto your toes or heels too much.
Think of having three points of contact:
Base of the big toe
Base of the little toe
Heel
Press through the floor evenly. This gives you a stable platform to lift from.
Keep the Reps Clean
Deadlifts are not usually the best exercise for sloppy, high-rep fatigue work, especially for beginners. As you get tired, your back position and bracing can break down.
Instead of chasing a huge number of reps, focus on clean sets.
For beginners, sets of 3–8 controlled reps often work better than long, exhausting sets. The exact number depends on your program, weight, and experience, but the principle is the same: stop before your form falls apart.
If every rep looks different, the weight may be too heavy, the set may be too long, or you may need more practice.
Rest Enough Between Sets
Deadlifts use a lot of muscle and nervous system effort. If you rush your rest, your next set may feel messy.
Give yourself enough time to breathe normally, reset your focus, and prepare your brace again. For light technique practice, shorter rest may be fine. For heavier sets, longer rest is usually needed.
Do not turn deadlifts into a race. Quality matters more than speed.
Know the Difference Between Muscle Work and Warning Pain
It is normal to feel deadlifts in your glutes, hamstrings, upper back, grip, and sometimes the general muscles of the lower back. But there is a difference between normal effort and warning pain.
Be cautious if you feel:
Sharp lower back pain
Pain shooting down the leg
Sudden pulling or grabbing sensation
Numbness or tingling
Pain that gets worse each rep
Pain that changes your walking or posture afterward
Stop the set if something feels wrong. Do not try to prove toughness through back pain.
Mild soreness after learning a new movement can happen. But repeated lower back pain after every deadlift session is a sign to check your form, load, recovery, or exercise selection.
Avoid Deadlifting When You Are Too Fatigued
Deadlifts require focus. If you are exhausted from a long workout, poor sleep, heavy stress, or previous hard training, your technique may suffer.
This does not mean you can only deadlift on perfect days. But be honest about your readiness. On low-energy days, reduce the weight, lower the volume, or practice lighter variations.
A tired body often takes shortcuts. The hips may rise too quickly. The brace may weaken. The bar may drift forward. These small changes matter.
Use Shoes That Help You Stay Stable
Footwear can affect your deadlift. Soft, thick running shoes may compress under load and make balance harder. Many lifters prefer flat, stable shoes for deadlifting.
You do not need special shoes right away, but avoid overly cushioned shoes if they make you feel unstable. A firm sole helps you push through the floor more evenly.
Some people deadlift in flat trainers, minimalist shoes, or lifting shoes depending on the variation. The key is stability.
Film Your Form Occasionally
You may not feel what your body is actually doing during a deadlift. Filming a set from the side can be very helpful.
Look for:
Is the bar close to your body?
Does your back position stay consistent?
Do your hips shoot up too early?
Are you jerking the start?
Are you overextending at the top?
Does the weight move smoothly?
You do not need to obsess over every angle. But occasional video feedback can reveal habits you might not notice otherwise.
Get Coaching If You Feel Unsure
Deadlifts are worth learning properly. If you feel confused or keep feeling discomfort, consider getting help from a qualified trainer, coach, or experienced lifter who understands technique.
A few minutes of good feedback can save you weeks of frustration. Sometimes a tiny adjustment to stance, hip height, bar position, or bracing makes the lift feel completely different.
Online videos can help, but personal feedback is often more useful because your body proportions and movement patterns are unique.
Final Thoughts
The deadlift can be a powerful exercise, but beginners should approach it with patience. Protecting your lower back is not about avoiding deadlifts forever. It is about learning how to lift with better control.
Start with the hip hinge. Keep your spine neutral. Brace before each rep. Keep the weight close. Use your legs and hips instead of pulling with your lower back. Choose a weight you can control, and stop before your form breaks down.
A good deadlift should feel strong, steady, and focused. It does not need to be rushed, forced, or painfully heavy to be effective.
When you respect the basics, the deadlift becomes more than just picking up weight. It becomes a skill that can build strength, confidence, and better body awareness both inside and outside the gym.
Hi, I’m the creator and editor behind ZestyHabit. I research everyday safety, first aid, and practical wellness topics using official guidance and reliable public sources, then turn that information into clear, realistic steps for daily life.
My goal is to help readers make safer, better-informed choices at home and beyond.
[…] Hard-packed wet sand near the waterline feels easier, but it has its own issue: beaches often slope toward the ocean. Running for a long time on a slanted surface can make one leg work differently from the other. Over time, that uneven loading may irritate your ankles, knees, hips, or lower back. […]
Loading…
Discover more from
Subscribe now to keep reading and get access to the full archive.



[…] Hard-packed wet sand near the waterline feels easier, but it has its own issue: beaches often slope toward the ocean. Running for a long time on a slanted surface can make one leg work differently from the other. Over time, that uneven loading may irritate your ankles, knees, hips, or lower back. […]