
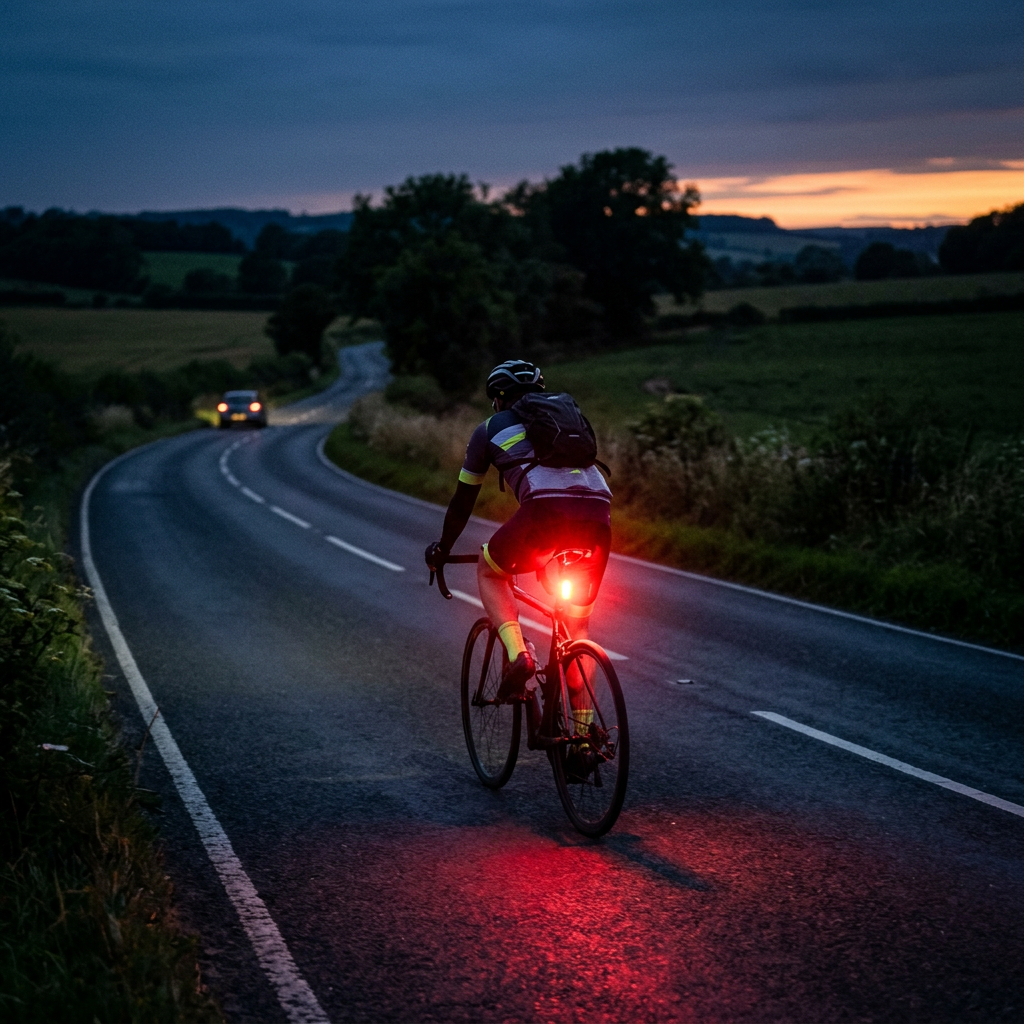

Learn how to mount, use, test, and replace a bike rear light for safer cycling in darkness, rain, fog, and daytime traffic.
A bicycle rear light is a small piece of equipment with an important job: helping drivers, pedestrians, and other cyclists recognize that someone is riding ahead of them.
Unfortunately, simply owning a bright bicycle tail light does not guarantee that you are visible. The light may be pointed toward the ground, covered by a jacket, hidden behind a saddlebag, running on a weak battery, or attached to a loose mount that slowly rotates during the ride. A cyclist may believe the light is working perfectly while approaching drivers see only an occasional flash—or nothing at all.
A properly positioned red rear light can improve a rider’s visibility at night and in poor weather. The National Highway Traffic Safety Administration recommends using a white front light, red rear light, reflectors, and reflective equipment when riding at night or whenever visibility is poor. NHTSA also notes that active lighting generally improves motorists’ detection and recognition of cyclists.
This guide explains where to mount a bike rear light, how to choose an appropriate operating mode, how to check visibility before riding, and when an aging light should be repaired or replaced.
Why a Bicycle Rear Light Matters

Cyclists are physically smaller than cars and motorcycles, making them more difficult to identify in darkness, rain, fog, glare, and visually cluttered urban environments. A driver may see a small point of light without immediately understanding that it belongs to a cyclist moving along the road.
A red rear light helps communicate both presence and direction. Red is associated with the rear of a vehicle, while a steady or repeating light pattern can help another road user track the cyclist’s position.
Visibility becomes particularly important around:
- Intersections and driveways
- Roundabouts
- Roads without dedicated bike lanes
- Areas with parked vehicles
- Rural roads without streetlights
- Tunnels and underpasses
- Dawn and dusk
- Rain, fog, snow, or heavy spray
- Roads where sunlight creates strong glare
Nighttime roadway risk is not caused by one factor alone. Reduced contrast, glare from headlights, driver fatigue, speeding, distraction, and limited sight distance can all contribute. Federal transportation guidance identifies improved nighttime visibility as an important part of protecting vulnerable road users, including cyclists and pedestrians.
A rear light cannot compensate for dangerous road design, excessive vehicle speed, or a distracted driver. It is one layer of protection rather than a guarantee of safety.

Rear Lights and Reflectors Are Not the Same
A reflector returns light toward its source. It becomes visible when a vehicle’s headlights shine on it, but it does not create its own light.
An active rear light produces light continuously or in a flashing pattern. It can therefore attract attention before a cyclist enters the strongest part of a vehicle’s headlight beam.
In the United States, federal bicycle requirements generally specify a red rear reflector, pedal reflectors, and side reflectors or reflective wheel surfaces on new bicycles. The Consumer Product Safety Commission also specifies positioning and performance requirements for those reflectors.
However, a reflector should not be treated as a complete substitute for an active bicycle tail light. Dirt, mud, luggage, poor alignment, weak vehicle headlights, or the angle between the cyclist and driver can reduce reflector performance.
For more reliable visibility, use both:
- A functioning red rear light
- A clean, correctly positioned rear reflector
Check your local laws as well. Lighting requirements vary by country, state, province, and municipality. Many jurisdictions require active lights during darkness, and some apply lighting rules during other low-visibility conditions. NHTSA notes that most U.S. states have laws requiring lights and reflectors for nighttime cycling.
Where Should You Mount a Bike Rear Light?
The best position is stable, rear-facing, and clearly visible to approaching traffic.
Common mounting locations include the seatpost, rear rack, saddlebag loop, rear fender, backpack, and helmet. Each option has advantages and limitations.
Seatpost Mounting
The seatpost is one of the most common locations because it places the light near the centerline of the bicycle. It usually provides good visibility when the rider is not carrying a large saddlebag.
Before riding, confirm that the light is not blocked by:
- The rear tire
- A saddlebag
- A long jacket or raincoat
- Loose clothing
- A child seat
- A cargo rack
- A basket
- Bikepacking equipment
Compact bicycles and bikes with low saddles may have very little exposed seatpost. In that case, a rack-mounted light may be more practical.
Rear Rack or Fender Mounting
A rack-mounted light can provide a wide, stable view from behind, especially on commuter, touring, and cargo bikes. Use hardware designed for the rack rather than improvising with weak tape or loose clips.
A low-mounted light can still be effective when it faces directly backward and remains unobstructed. However, check that panniers, cargo straps, and bags do not cover it.
Fender-mounted lights should be inspected regularly because vibration, road spray, and impacts may loosen the bracket.
Backpack or Clothing Mounting
A clip-on light attached to a backpack can add visibility, but it should usually be considered a secondary light rather than the only one.
Backpacks shift as the rider moves. The light may tilt downward, rotate sideways, or become covered by a rain cover. A loosely attached clip may also fall off without the rider noticing.
NHTSA advises cyclists that a flashing red light attached to the bicycle, backpack, or helmet can increase visibility. Nevertheless, a firmly mounted light on the bicycle offers a more consistent reference point for other road users.
Helmet Mounting
A helmet light sits relatively high and may be easier to see above parked cars or roadside obstacles. It can be a useful backup, especially for commuters and long-distance riders.
It should not normally replace the bicycle-mounted rear light. Every time you turn your head, the beam changes direction. A driver directly behind you may briefly lose sight of it. A helmet light also disappears when the helmet is removed at a stop.
A reliable setup often uses one stable light on the bicycle and a second light on the helmet, bag, or clothing.
Aim the Light Correctly
A powerful light pointed in the wrong direction provides little benefit.
Stand behind the bicycle at several distances and check the beam. The brightest portion should face approaching road users rather than the ground, rear wheel, sky, or side of the road.
The light should remain visible when you move slightly to the left and right. This matters on curved roads and when vehicles approach from an offset position.
Avoid aiming an extremely bright light directly into another person’s eyes at close range. A dazzling beam can be uncomfortable for drivers and other cyclists. It may also make it harder for someone to judge your exact distance and movement.
After adjusting the angle, tighten the mount according to the manufacturer’s instructions. Push the light gently to confirm that vibration will not rotate it. Recheck the position after riding on rough pavement.
Steady or Flashing Mode?
Many bicycle rear lights offer several modes, including steady, slow pulse, rapid flash, and irregular flash.
There is no single best mode for every situation.
A flashing light can attract attention, particularly during daylight or in visually busy surroundings. NHTSA’s review of active bicycle lighting reports that daytime flashing lights improved cyclist detection and cites a controlled trial in which daytime flashing-light use was associated with fewer crashes during the study period.
A steady light, however, may make it easier for another road user to judge the cyclist’s position, speed, and distance in complete darkness. A very rapid or irregular flash can attract attention but may be harder to track.
A practical approach is:
- Use a noticeable flashing or pulsing mode during daylight.
- Use a steady light at night, especially on dark roads.
- Use two lights—one steady and one pulsing—when conditions are especially poor.
Check local regulations before selecting a mode. Some places restrict certain flashing patterns, colors, or brightness levels.
The light should always be red when facing backward. Do not mount a white headlight facing the rear, as this may confuse other road users about your direction of travel.
How Bright Should a Rear Light Be?
Brightness is commonly advertised in lumens, but the largest number is not automatically the safest choice.
Actual visibility also depends on:
- Lens design
- Beam width
- Viewing angle
- Mounting position
- Flash pattern
- Ambient lighting
- Weather
- Battery charge
- Distance from the observer
A modest, well-designed light aimed correctly may be more useful than an extremely bright light pointed downward.
For daytime riding, the light must compete with sunlight, reflections, vehicle lights, and visual clutter. A higher-output daytime mode may be appropriate. At night, especially on a shared path or in a group ride, the brightest setting may be unnecessary and distracting.
Choose a light with clearly separated modes rather than relying only on maximum output. A broad viewing angle is particularly helpful at intersections, where vehicles may approach from behind and slightly to the side.
Perform a Rear-Light Check Before Every Ride
A quick check takes less than a minute and can reveal problems before you enter traffic.
Turn the light on while standing behind the bicycle. Do not confirm operation only by looking over your shoulder from the saddle; that angle may not show whether the lens is blocked.
Check that:
- The light turns on immediately.
- The selected mode works normally.
- The beam faces backward.
- The lens is clean.
- No bag or clothing blocks it.
- The mounting bracket is tight.
- The battery indicator shows enough power.
- A backup light or spare battery is available for long rides.
Rechargeable lights can lose power faster in cold weather, and some lights reduce output automatically as the battery becomes depleted. Do not assume that a light remains at full brightness simply because it has not switched off.
For a long ride, test the actual runtime at home. Manufacturer estimates may vary according to brightness mode, battery age, temperature, and charging condition.
Keep the Lens and Mount Clean
Road spray, mud, dust, and dried salt can significantly reduce the amount of visible light leaving the lens.
Wipe the lens with a soft, damp cloth. Avoid harsh solvents unless the manufacturer specifically approves them, as chemicals may damage the plastic or seals.
Inspect the bracket for cracks and check rubber straps for stretching, splitting, or loss of elasticity. A strap may still hold the light while parked but fail after repeated vibration.
After riding in heavy rain, remove detachable lights and allow the exterior to dry. If water appears inside the lens, stop relying on that light until it has been inspected or replaced. Moisture can corrode contacts, damage electronics, and cause unpredictable operation.
A product described as water-resistant is not necessarily designed to survive prolonged submersion or high-pressure washing.
When Should a Bicycle Tail Light Be Replaced?

There is no universal replacement schedule for all bike lights. Condition and reliability matter more than age alone.
Replace the light or damaged component when you notice:
- A cracked or cloudy lens
- Water inside the housing
- Intermittent operation
- Unexplained flickering
- A button that no longer responds consistently
- A loose charging port
- Corroded battery contacts
- A bracket that will not remain tight
- Major reduction in brightness
- Runtime that has become too short for normal rides
- A swollen, leaking, or damaged rechargeable battery
- Heat, odor, or discoloration during charging
Stop charging a light that becomes unusually hot, smells strange, swells, or shows visible battery damage. Place it away from combustible materials and follow local instructions for lithium-ion battery disposal. Do not puncture, crush, or place a rechargeable battery in ordinary household trash where prohibited.
A worn mounting strap can often be replaced separately. However, a light that switches off unpredictably should not remain your primary safety light even if it occasionally works during testing.
Reliability is the standard. A rear light that works only when the button is pressed several times or the housing is tapped is already overdue for replacement.
What to Do If the Light Fails During a Ride
Move away from traffic and stop in a well-lit, safe location.
Try a spare battery, backup light, or charging source if available. Check whether the light has slipped behind a bag or switched to a low-power mode.
Do not continue along a dark, high-speed road while assuming reflectors alone will be enough. Consider using a safer route, walking the bicycle, calling for transportation, or waiting in a secure, illuminated location.
A smartphone flashlight is not a good permanent substitute. It may be difficult to mount securely, drain the phone battery needed for emergencies, and produce the wrong beam color or direction.
Carrying a small secondary rear light is usually simpler and safer.
Common Rear-Light Mistakes
One frequent mistake is turning the light on without checking whether it is visible from behind. Another is using only a helmet or backpack light that constantly changes direction.
Cyclists also commonly forget to:
- Recharge the light after a short previous ride
- Recheck the mounting angle after transporting the bicycle
- Remove dirt from the lens
- Move the light after installing a larger saddlebag
- Inspect the mounting strap for wear
- Carry a backup on long nighttime rides
- Check whether a coat covers the seatpost light
- Confirm the light after attaching cargo
Reflective clothing, wheel reflectors, pedal reflectors, and reflective tape can provide additional visual cues. CPSC requirements recognize the value of rear, pedal, and side reflectors in helping motorists detect bicycles at night.
Use these features together rather than relying on one tiny point of light.
Build a Complete Visibility System
A rear light is most effective as part of a broader strategy.
Use a white front light so that you can be seen from ahead and, where necessary, illuminate the road. Keep required reflectors installed and clean. Wear bright colors during the day and reflective material during darkness or bad weather. NHTSA recommends combining lights, reflectors, bright clothing, and reflective equipment when visibility is limited.
Ride predictably, follow traffic rules, signal before turning, and avoid remaining in vehicle blind spots. Choose routes with lower traffic speeds or protected cycling infrastructure when available.
Visibility equipment helps other road users detect you, but it does not remove the need for attentive riding or safer streets.
The Bottom Line
A bike rear light should be red, stable, correctly aimed, fully charged, and visible from behind without being blocked by clothing or cargo. A bicycle-mounted light should normally serve as the primary rear light, while a helmet or backpack light can provide useful backup visibility.
Test the light before every ride. Clean the lens, inspect the mount, check the battery, and confirm the beam from behind the bicycle. Replace the light when it becomes unreliable, dim, damaged, waterlogged, or unable to provide enough runtime for your usual route.
Most importantly, do not confuse “the light is turned on” with “the light can be seen.” Take a few seconds to view your bicycle from a driver’s perspective before entering the road.
Where do you mount your bicycle rear light, and do you prefer a steady beam, flashing mode, or a combination of both? Share your setup, commuting conditions, and any rear-light failures you have experienced in the comments. Your experience may help another cyclist improve their visibility before the next ride.

Hi, I’m the creator and editor behind ZestyHabit. I research everyday safety, first aid, and practical wellness topics using official guidance and reliable public sources, then turn that information into clear, realistic steps for daily life.
My goal is to help readers make safer, better-informed choices at home and beyond.


