
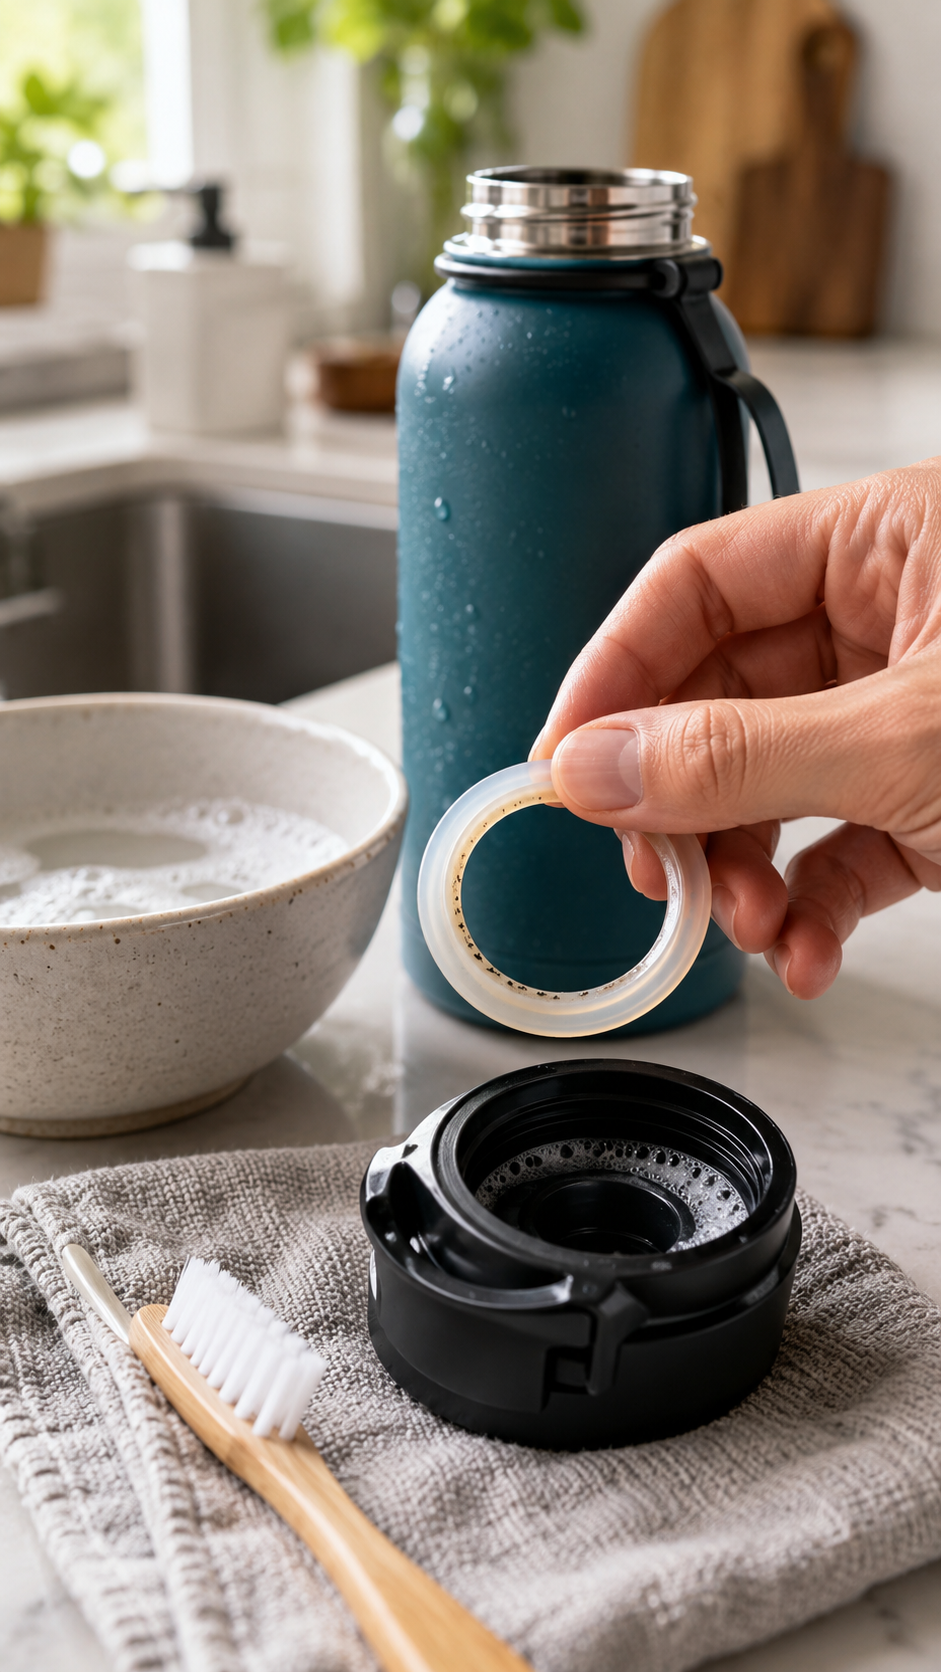

Is your water bottle gasket really clean? Learn where bacteria and mold hide, how to remove the rubber seal, and how to wash, sanitize, dry, and replace it safely.
A reusable water bottle may look spotless from the outside, yet one of its dirtiest parts can remain almost completely hidden. Beneath the lid, a small rubber or silicone gasket creates the watertight seal that prevents leaks. That same narrow space can trap moisture, saliva, beverage residue, and tiny food particles.
Because the gasket is pressed tightly into a groove, simply rinsing the bottle or running water over the lid may not clean the surfaces underneath it. Over time, the hidden area can develop a slippery film, sour odor, dark discoloration, or visible mold.
The good news is that most water bottle gaskets are easy to maintain once you know they are removable. Regular disassembly, scrubbing, sanitizing when needed, and complete air-drying can prevent much of the buildup. Here is how to clean a water bottle gasket correctly without damaging the seal or exposing it to unsafe chemical mixtures.
What Is the Rubber Ring Inside a Water Bottle Lid?
The ring inside the lid is usually called a gasket, sealing ring, O-ring, or lid seal. Although people commonly describe it as rubber, many modern bottle gaskets are made from food-grade silicone.
The gasket fills the small space between the lid and the bottle opening. When the lid is tightened, the flexible material compresses and forms a leak-resistant seal.
Depending on the bottle design, there may be several removable parts:
- A large gasket around the inside edge of the lid
- A smaller seal beneath a drinking spout
- A valve inside a flip-top cap
- A silicone sleeve around a straw
- A seal underneath a push button
- A removable mouthpiece or bite valve
Each piece creates additional edges, crevices, and contact points. A bottle with a complicated lid may therefore require more attention than a simple wide-mouth bottle with a basic screw cap.
Why Gaskets Become Dirty So Easily
A gasket sits in a warm, enclosed location where water does not evaporate quickly. Every time you drink, small amounts of liquid may travel into the seam between the seal and the lid.
Even bottles used only for plain water are exposed to microorganisms from:
- Your mouth and saliva
- Fingers touching the lid or drinking spout
- Backwash entering the bottle
- Countertops, bags, cup holders, and gym equipment
- Dishcloths, sponges, and cleaning brushes
- Water left sitting at room temperature
Sweetened drinks create an even more favorable environment for buildup. Sports drinks, juice, sweetened tea, flavored water, smoothies, milk, protein shakes, and coffee with cream can leave nutrients behind. These residues may remain underneath the gasket even after the visible portion of the lid appears clean.
A peer-reviewed study of 90 reusable bottles found substantial variation in microbial contamination and reported that beverage type, cleaning behavior, refill frequency, and bottle material could affect contamination levels. Bottles recently used for drinks such as soda, coffee, or tea were more contaminated than bottles used only for water. The full study is available through Food Protection Trends.
This does not mean every reusable bottle will make its owner sick. It does mean that a bottle should be treated like any other food-contact item rather than as a container that only needs an occasional rinse.
Where Bacteria and Mold Hide
The most obvious place to check is underneath the main gasket, but it is not the only potential hiding spot. Examine the entire lid carefully.
Pay attention to:
- The channel that holds the gasket
- The underside of the rubber or silicone ring
- Threads inside the cap
- Hinges on flip-top lids
- Straw connections
- Pressure-release holes
- Air vents
- Bite valves
- Sliding covers
- Push-button mechanisms
- The seam around the mouthpiece
Buildup may appear black, brown, pink, orange, green, or gray. It can also be colorless. A slimy or slippery surface may indicate a biofilm—a community of microorganisms attached to a surface and surrounded by a protective matrix.
Because a biofilm can cling to the gasket and lid, swirling soapy water inside the bottle is not enough. Physical scrubbing is important for loosening material before sanitizing.
Is Every Black Spot Mold?
Not necessarily. Dark marks may be mold, beverage staining, mineral deposits, degraded silicone, transferred pigments, or grime trapped in a scratch.
Appearance alone may not identify the cause with certainty. However, you should treat unexplained black or colored growth as contamination, especially if it:
- Has appeared gradually
- Feels raised or slimy
- Returns after ordinary washing
- Is accompanied by a musty smell
- Spreads along the gasket groove
- Can be partially removed by scrubbing
If discoloration remains embedded after thorough cleaning and manufacturer-approved sanitizing, replacing the gasket is safer and more practical than continuing to use a seal you cannot confidently clean.
How Often Should You Clean a Water Bottle Gasket?
A bottle used every day should ideally be emptied, disassembled, and washed at the end of the day. This is particularly important when you drink directly from the bottle rather than pouring the water into a cup.
Wash it immediately after use if it contained:
- Milk or dairy-based beverages
- Protein shakes
- Smoothies
- Juice
- Sports or electrolyte drinks
- Sweetened coffee or tea
- Formula or a child’s drink
- Any beverage containing sugar, fat, or protein
Deep sanitizing does not necessarily need to be performed every day. It may be appropriate periodically, after the bottle has been forgotten with liquid inside, after an illness, or when you notice an odor or residue.
People with weakened immune systems, older adults, pregnant people, and families preparing bottles for young children may want to follow a particularly consistent cleaning routine.
How to Remove the Gasket Without Damaging It
First, check the bottle manufacturer’s instructions. Some seals are designed to be removed regularly, while others are not intended for routine removal. Forcing a non-removable valve apart may damage the lid.
If the gasket is removable:
- Wash your hands.
- Place the lid on a clean towel.
- Use your fingertip to gently lift one section of the gasket.
- Slowly pull the ring out of its channel.
- Note its direction before removal so you can reinstall it correctly.
If the seal is difficult to reach, use a blunt plastic gasket tool approved for the bottle. Avoid knives, needles, scissors, metal picks, and other sharp objects. A tiny cut or puncture can create another place for residue to collect and may cause the bottle to leak.
Take a photo before disassembly if the lid contains several small parts. This makes correct reassembly easier.
Step-by-Step Routine Cleaning Method
For daily cleaning, dish soap, warm water, scrubbing, and complete drying are usually the most important tools.
Step 1: Disassemble the Lid
Remove every part the manufacturer identifies as washable and removable. This may include the gasket, straw, mouthpiece, valve, and exterior sleeve.
Step 2: Rinse Away Loose Residue
Rinse the bottle and lid parts under warm running water. This removes loose beverage residue but should not replace washing with detergent.
Step 3: Wash With Dish Soap
Fill a clean basin with warm water and a small amount of dishwashing liquid. Wash the bottle, lid, gasket, straw, and mouthpiece separately.
Use:
- A bottle brush for the bottle’s interior
- A small nylon brush for the gasket channel
- A straw brush for narrow tubes
- A clean, soft toothbrush for lid crevices
Scrub both sides of the gasket, especially its edges and any ridges. Bend it gently so the brush can reach the entire surface, but do not overstretch it.
Step 4: Rinse Thoroughly
Rinse every part with clean water until no soap or loosened residue remains. Pay particular attention to hollow valves and straws, where detergent can become trapped.
Step 5: Inspect the Parts
Check the gasket groove and seal under bright light. If you still see film or discoloration, scrub the area again before sanitizing.
Step 6: Air-Dry Completely
Place all components separately on a clean drying rack or towel. Position the bottle upside down at an angle so air can circulate rather than sealing the opening against a flat surface.
Do not reinstall the gasket or close the bottle while moisture remains. Trapping damp parts together recreates the exact environment you are trying to prevent.
Can You Put the Gasket in the Dishwasher?
Only if the manufacturer says the bottle, lid, and gasket are dishwasher-safe.
Dishwasher heat and detergent may warp certain plastics, weaken adhesives, fade finishes, damage insulated lids, or shorten the life of some seals. “Dishwasher-safe bottle” also does not always mean every lid component can go in every rack.
When dishwasher use is permitted:
- Remove the gasket from the lid.
- Separate all washable components.
- Secure small parts in a closed utensil basket or dishwasher-safe mesh container.
- Place delicate plastic parts on the top rack if instructed.
- Select a sanitizing cycle only when the product allows it.
- Let everything dry fully before reassembly.
A dishwasher may not clean a gasket properly if the seal remains compressed inside its groove. Disassembly still matters.
How to Sanitize a Water Bottle Gasket With Diluted Bleach
Cleaning and sanitizing are not identical. Cleaning removes soil, residue, and much of the microbial buildup. Sanitizing is performed after cleaning to further reduce microorganisms on the surface.
Before using bleach, confirm that the manufacturer permits it on the gasket, lid, bottle coating, and any metal components. Chlorine may discolor certain materials or damage finishes.
For bleach-compatible water containers, the CDC’s water-storage container guidance recommends:
- Wash the container with soap and rinse it.
- Mix 1 teaspoon of regular, unscented household chlorine bleach with 1 quart (4 cups) of water.
- Use bleach containing 5% to 9% sodium hypochlorite.
- Make sure the solution contacts all interior surfaces.
- Wait at least 30 seconds.
- Pour out the solution and allow the container to air-dry.
If applying this method to removable bottle components, the solution must reach both sides of the gasket and the empty gasket channel. Use a freshly prepared solution and follow the bottle manufacturer’s directions if they specify a different dilution or contact time.
Important bleach precautions include:
- Never mix bleach with vinegar.
- Never mix bleach with ammonia.
- Never mix it with alcohol, peroxide, or other cleaners.
- Use regular unscented bleach, not scented, gel, or splashless products unless specifically approved.
- Work in a well-ventilated area.
- Wear gloves when appropriate.
- Do not use concentrated bleach directly on the gasket.
Mixing bleach with other cleaning products can release dangerous gases. More bleach is not automatically more effective and may damage the bottle.
What About Vinegar, Baking Soda, or Boiling Water?
White vinegar can help reduce odors and loosen some mineral deposits, but it should not be assumed to disinfect every organism. It is better viewed as a supplemental cleaner than a guaranteed replacement for an approved sanitizer.
Baking soda may help with odors and light staining, but it is not a reliable disinfectant. Avoid scrubbing soft seals with an excessively abrasive paste because scratches and surface damage can make future cleaning harder.
Boiling may be effective for components specifically designed to tolerate high heat. However, not all gaskets, lids, straws, and valves are boil-safe. Heat can warp plastic, deform a seal, and damage insulated cap mechanisms. Check the manufacturer’s temperature and cleaning instructions before boiling any component.
Denture tablets and bottle-cleaning tablets can be convenient for odor removal, but their suitability depends on the product and bottle material. Follow the tablet and bottle manufacturers’ directions, and remember that soaking does not always replace physical scrubbing beneath the gasket.
When Should You Replace the Gasket?
A reusable gasket does not last forever. Replace it if it is:
- Cracked, torn, stretched, or warped
- Permanently sticky or slimy
- Brittle or unusually soft
- Unable to remain seated in its groove
- Causing the bottle to leak
- Producing a persistent odor
- Covered with discoloration that cannot be removed
- Missing small pieces
- No longer possible to clean thoroughly
Replacement gaskets are often available from the bottle manufacturer. Choose the exact part intended for your bottle model because seals that look similar may differ slightly in size or shape.
If a replacement is unavailable and contamination cannot be removed, replacing the lid—or the entire bottle—may be necessary.
Habits That Keep the Gasket Cleaner
Prevention makes bottle care much easier. Empty leftover liquid at the end of the day instead of repeatedly topping off old water. Wash the bottle before refilling it, and avoid touching the drinking surface with unwashed hands.
After cleaning, store the bottle with its lid off or loosely attached. Keep separate bottles for plain water and protein shakes if possible, since fatty and protein-rich residues can be harder to remove from complex lids.
Finally, choose bottle designs you can realistically disassemble. A stylish cap with multiple hidden valves is not a good bargain if its internal surfaces cannot be reached. Wide openings, simple screw caps, replaceable gaskets, and clearly labeled dishwasher-safe components usually make long-term hygiene easier.
Final Thoughts
The rubber or silicone gasket may be one of the smallest parts of a reusable water bottle, but it deserves as much attention as the bottle itself. Moisture and residue can collect beneath the seal even when the visible surfaces look clean. Regular disassembly, warm soapy water, careful brushing, complete drying, and occasional manufacturer-approved sanitizing can prevent most odors, slime, bacterial buildup, and mold problems.
Have you ever removed your water bottle gasket and been surprised by what was underneath it? What type of bottle do you use, and which cleaning method works best for its lid and seals? Share your experience in the comments—your tip might help another reader discover a hidden part they have been forgetting to clean.

Hi, I’m the creator and editor behind ZestyHabit. I research everyday safety, first aid, and practical wellness topics using official guidance and reliable public sources, then turn that information into clear, realistic steps for daily life.
My goal is to help readers make safer, better-informed choices at home and beyond.


