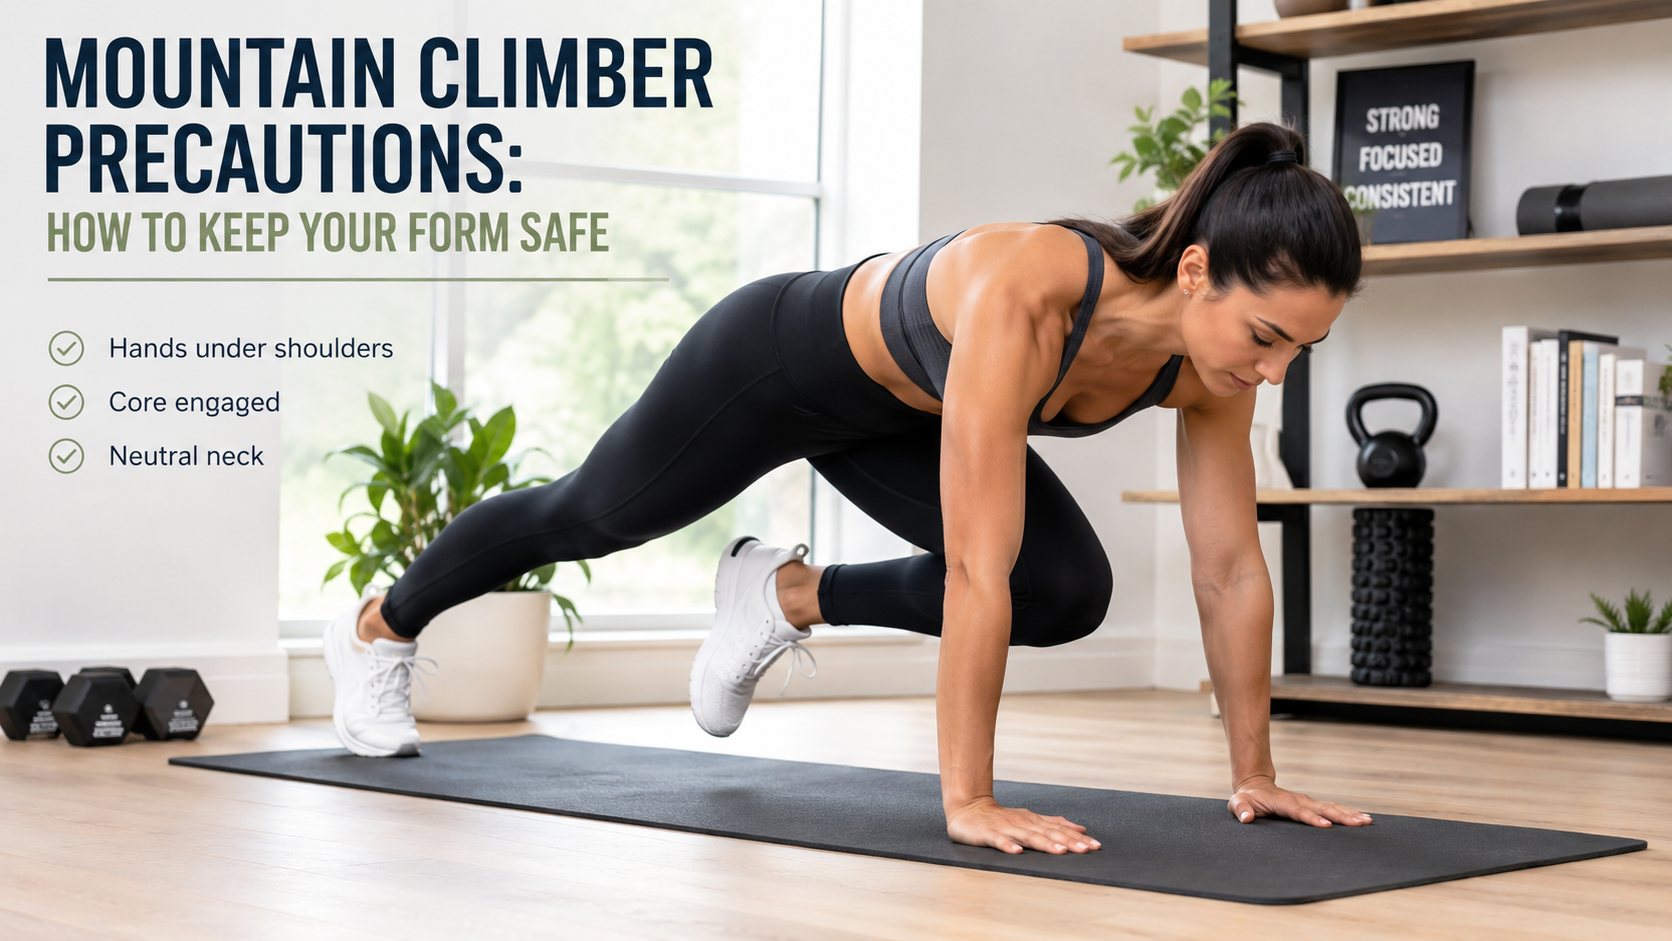
Mountain Climber Precautions: How to Keep Your Form Safe
Minjin Park
·
Mountain climbers look like a simple bodyweight move. You get into a plank position, drive your knees toward your chest, and move quickly as if you are running on the floor. They are popular in home workouts, bootcamp classes, HIIT routines, warm-ups, and core circuits because they raise the heart rate fast and require no equipment.
But because mountain climbers are often done quickly, form can fall apart before you notice it. The hips bounce, the wrists ache, the lower back sags, the shoulders creep up, and the movement becomes more chaotic than controlled. Instead of feeling like a strong core exercise, it can start to feel like pressure in the wrists, tightness in the lower back, or strain through the shoulders and hips.
Mountain climbers can be an effective exercise, but they are not just about speed. They require core stability, shoulder control, wrist comfort, hip positioning, and steady breathing. When those pieces work together, the movement feels powerful and athletic. When they do not, the body often compensates in uncomfortable ways.
Here are the main mountain climber precautions to keep your form safe, especially if you want to protect your wrists, lower back, shoulders, and hips while still getting a good workout.
Mountain climbers combine a plank with fast leg movement. That means your upper body has to support your weight while your core resists twisting and your legs move repeatedly.
This is a lot to manage at once.
If your core is not stable, your lower back may sag. If your hips lift too high, the exercise becomes less effective and more like a rushed pike position. If your shoulders are not positioned well, your wrists may take too much pressure. If your feet slam into the floor, your hips and lower back may feel jarred.
The exercise is often treated as a cardio move, but it is also a strength and stability exercise. That is why form matters.
A safe mountain climber should feel challenging in your core, shoulders, hip flexors, and breathing. It should not feel sharp in your wrists, pinching in your lower back, or uncontrolled through your hips.
Start With a Strong Plank Position
Before you move your legs, set your plank.
Your hands should be under your shoulders or slightly wider. Your fingers should spread into the floor, not stay squeezed together. Your arms should be strong, but your elbows do not need to lock aggressively.
Your body should form a long line from head to heels. Your ribs should not drop toward the floor, and your hips should not stick high into the air. Think of your torso as one steady piece.
A helpful cue is: strong plank first, mountain climber second.
If the plank position already feels shaky, fast mountain climbers will probably make it worse. In that case, practice holding a high plank first. Even 15 to 30 seconds of good alignment can build the foundation you need.
Keep Your Core Stable
Core stability is the heart of the exercise. Without it, mountain climbers turn into a bouncing movement where the lower back and hips do too much of the work.
Before bringing your knee forward, gently brace your abs as if preparing for someone to tap your stomach. You do not need to squeeze so hard that you stop breathing. You just want enough tension to keep your spine supported.
As your legs move, your torso should stay relatively quiet. Some natural movement is fine, but your hips should not swing dramatically from side to side.
If your lower back starts to sag, slow down. If your hips are bouncing up and down, slow down. If your shoulders are shifting forward and back with every rep, slow down.
Speed should never come before control.
Avoid Letting Your Lower Back Sag
One of the most common mountain climber mistakes is letting the lower back drop toward the floor. This usually happens when the core gets tired or the legs move faster than the body can control.
To prevent this, keep your ribs gently pulled in and your pelvis controlled. Imagine slightly drawing your hip bones toward your ribs. This can help prevent the belly from dropping and the back from arching too much.
If you cannot keep your back supported, modify the exercise. Put your hands on a bench, step your feet instead of running them, or take a break.
There is no benefit in pushing through sloppy reps if your back is taking the strain.
Do Not Hike Your Hips Too High
The opposite problem can also happen. Some people lift their hips high into the air to make the movement easier. This reduces core demand and changes the angle of the exercise.
A slightly raised hip position may be acceptable for certain modifications, but in a standard mountain climber, your body should stay closer to a plank line. If your hips are very high, you may no longer be training the movement as intended.
High hips can also shift your weight awkwardly into your shoulders and wrists. You may feel like you are just hopping your legs forward instead of controlling the movement through your core.
Try to keep your hips level with your shoulders, or only slightly higher if needed for comfort. The goal is not a perfect straight line at all costs, but a stable plank that you can maintain.
Protect Your Wrists
Mountain climbers can put a lot of pressure through the wrists because your hands support your upper body while your legs move quickly.
If your wrists ache, first check your hand position. Your hands should be under your shoulders, with fingers spread wide. Press through the whole hand, including the base of the fingers, not only the heel of the palm.
Avoid collapsing into the wrists. Push the floor away slightly so your shoulders stay active. This spreads the work through your arms, shoulders, chest, and core instead of dumping everything into the wrist joint.
If standard floor mountain climbers bother your wrists, try doing them with your hands on dumbbell handles, push-up bars, yoga blocks, or a bench. A raised surface can reduce wrist extension and make the exercise more comfortable.
You can still get a strong workout without forcing your wrists into a painful position.
Keep Your Shoulders Stable
Your shoulders should stay strong and steady during mountain climbers. They should not shrug up toward your ears or collapse between your shoulder blades.
Think about gently pushing the floor away. This helps activate the muscles around your shoulders and upper back. Your neck should stay long, and your head should stay in line with your spine.
If your shoulders creep up, take a breath and reset. Shoulder tension often appears when you are trying to go too fast or when your core is tired.
You should feel effort in the shoulders, but not pinching, sharp pain, or neck strain. If your upper body cannot stay stable, reduce the speed or choose an easier variation.
Watch Your Hip Position
Hip position is important because your legs are constantly moving in and out of the plank. If your hips twist with every knee drive, your lower back may end up doing too much rotational work.
Try to keep both hip bones facing the floor. When you bring one knee forward, avoid letting that side of the hip lift or swing outward too much.
This does not mean your body has to be frozen. Mountain climbers naturally create some movement. But the movement should be controlled, not wild.
A good test is to imagine a small glass of water resting on your lower back. It does not need to stay perfectly still, but it should not spill immediately.
Bring the Knee Forward With Control
Many people think the goal is simply to move the feet as fast as possible. But the quality of the knee drive matters.
Bring your knee toward your chest or toward the same-side elbow while keeping your foot light. Avoid slamming your toes into the floor. Avoid kicking your leg back aggressively.
Each rep should feel like a controlled knee drive, not a frantic scramble.
If your knees cannot come very far forward, that is okay. Hip mobility, core strength, and body proportions all affect range. You do not need to force your knee all the way to your chest if it causes your hips to round or your back to collapse.
Move through the range you can control.
Choose the Right Speed
Mountain climbers are often used in HIIT workouts, so people assume faster is always better. But speed only helps if your form stays organized.
If you are a beginner, start slowly. Step one foot forward, return it, then switch sides. This teaches the pattern without the chaos of fast transitions.
Once you can control slow mountain climbers, gradually increase the pace. Even then, your plank should stay strong, your shoulders should stay stacked, and your hips should not bounce excessively.
Fast but messy reps are not better than slower clean reps. They simply hide poor control under momentum.
Try Elevated Mountain Climbers
If floor mountain climbers feel too difficult or uncomfortable, elevate your hands.
Place your hands on a sturdy bench, step, box, or countertop. The higher surface reduces the amount of body weight your wrists and shoulders need to support. It also makes it easier to keep your spine aligned.
Elevated mountain climbers are excellent for beginners. They let you practice the movement while building strength and confidence.
As you improve, you can gradually lower the surface until the floor version feels manageable.
This is not “cheating.” It is smart progression.
Avoid Holding Your Breath
Because mountain climbers are intense, many people accidentally hold their breath. This creates extra tension in the neck, shoulders, chest, and core. It can also make the exercise feel harder than necessary.
Try to breathe rhythmically as you move. You might exhale every time one knee comes forward, or use a steady breathing pattern that matches your pace.
The exact pattern is less important than remembering to breathe.
If you cannot breathe smoothly, you may be going too fast or working beyond your current level. Slow down, reset, and continue with more control.
Warm Up Before Fast Mountain Climbers
Mountain climbers involve the wrists, shoulders, core, hips, knees, and ankles. Doing them cold at full speed can feel jarring.
Before adding them to a workout, warm up for a few minutes. You can do light cardio, arm circles, wrist circles, cat-cow movements, bodyweight squats, glute bridges, and slow plank shoulder taps.
A simple warm-up might look like this:
Warm-Up Move
Why It Helps
Wrist circles
Prepares the wrists
Arm circles
Warms the shoulders
Cat-cow
Mobilizes the spine
Glute bridges
Wakes up hips and core
Slow mountain climbers
Practices the pattern
The warm-up does not need to be long. It just needs to prepare the body for the position and pace.
Be Careful When Fatigued
Mountain climbers often appear near the end of workouts, when you are already tired. That is exactly when form tends to break down.
Fatigue can make your hips sag, your shoulders collapse, your wrists ache, and your breathing become rushed. You may still be moving, but the quality of the exercise drops.
Instead of forcing a long set, use shorter intervals. For example, try 15 to 20 seconds of clean mountain climbers, rest, then repeat. This is often better than doing one long sloppy minute.
Stop the set when your form changes. That is a sign your body has reached its current limit for that movement.
Know the Difference Between Effort and Pain
Mountain climbers should feel hard. Your heart rate may rise quickly. Your abs may burn. Your shoulders may work. Your hip flexors may feel active.
That kind of effort is normal.
Pain is different. Sharp wrist pain, pinching in the lower back, shoulder pain, numbness, tingling, or pain that gets worse as you continue should not be ignored.
If pain appears, stop and adjust. Change the surface, slow the pace, reduce the range, or switch to a different core exercise. If pain continues, it is better to avoid the movement and get professional guidance.
A workout should challenge your body, not punish your joints.
Common Mountain Climber Mistakes to Avoid
Here are some of the most common form mistakes:
Mistake
Why It Can Be a Problem
Letting the lower back sag
Can strain the spine and reduce core control
Raising hips too high
Makes the exercise less effective and shifts pressure
Most of these mistakes improve when you slow down and reset your plank.
Mountain Climber Variations for Safer Progress
Not everyone needs to start with the full-speed floor version. These variations can help you build up safely.
Variation
Best For
Elevated mountain climbers
Beginners or wrist/back discomfort
Slow mountain climbers
Learning control
Step-in mountain climbers
Lower-impact training
Sliding mountain climbers
Smooth core challenge with sliders
Cross-body mountain climbers
Oblique focus, if controlled
Plank knee taps
Very gentle beginner option
Choose the version that lets you keep good form. You can always make it harder later.
A Safe Form Checklist
Before starting your next set, check these points:
Form Check
What to Do
Hands
Under shoulders, fingers spread
Wrists
Pressure spread through the whole hand
Shoulders
Strong, not shrugged
Core
Braced but still breathing
Back
Long and supported
Hips
Level, not sagging or high
Knees
Drive forward with control
Feet
Light, not slamming
Speed
Fast only if form stays clean
This checklist takes only a moment, but it can make the exercise much safer and more effective.
When to Choose a Different Exercise
Mountain climbers are useful, but they are not mandatory. If they consistently bother your wrists, shoulders, lower back, or hips, choose another movement.
Good alternatives include dead bugs, bird dogs, planks, elevated planks, marching planks, standing knee drives, or low-impact step climbers. These exercises can still train your core and coordination without the same level of wrist pressure or fast movement.
Fitness is not about forcing one exercise because it is popular. It is about choosing the right tool for your body and your goal.
Final Thoughts
Mountain climbers can be a strong, efficient exercise for cardio and core training, but they require more control than they appear to. The safest version is not always the fastest version. It is the one where your plank stays steady, your wrists feel supported, your hips stay controlled, and your lower back does not sag.
Start with a strong plank. Keep your core stable. Protect your wrists by spreading pressure through your hands or using an elevated surface. Move your knees with control before adding speed. Most importantly, stop when your form begins to fall apart.
A good mountain climber should feel energetic and challenging, not chaotic or painful. When you respect the details, this simple exercise becomes much more effective—and much easier on your body.
Hi, I’m the creator and editor behind ZestyHabit. I research everyday safety, first aid, and practical wellness topics using official guidance and reliable public sources, then turn that information into clear, realistic steps for daily life.
My goal is to help readers make safer, better-informed choices at home and beyond.